Shotgun for Studio Client-side Productions
Shotgun can help make the tracking and management of feature films a streamlined process, where everyone involved has up-to-the-minute information at their fingertips, and files are tracked and ready for review no matter where you are.
This article covers how you can use Shotgun (with the Studio package) at every stage of the production, as well as introduce you to the tools and workflows that have been developed for and used on numerous feature films to ensure that information is clear, easy to find, and up-to-date at all times.
Pre-production
Importing media
During pre-production, one of the key priorities is gathering media from both the art department and from previsualisation (“Previs”) teams. One of the easiest ways to get started is to go to Shotgun’s Media app.
Just click “Media” in the navigation bar at the top and you’ll be taken there.
Once there, you can start getting artwork and previs media into your project simply by dragging it onto the page. This creates a “Version” for each file uploaded.
Tip: Once it’s in Shotgun, it can be viewed by everyone who has access to the project.
If you have a lot of media, you might find it useful to start organizing uploaded files into “Playlists”. Playlists let you group Versions together, and each Version can be added to multiple Playlists.
Registering vendors
Vendors can be added and managed from the Groups page (found in the top-right menu drop-down within the “Admin” section). From there, you can click +Group to add a new vendor and set their group type.
Create breakdowns
At this point in the production, story elements such as Sequences should start to take form, and can begin to be broken down in Shotgun. To get started, click “Sequences” from the project navigation bar at the top.

This will take you to a list of all the Sequences in your project, and from there you can create new sequences by clicking the + Sequence button.
Click on the Sequence name to view more details about a specific Sequence.
Similarly, you can also start to create Assets and Shots in the project, by clicking the respective button in the project navigation bar and + Asset or + Shot buttons on the page. With each of those, you’ll have the ability to link them to Sequences you’ve previously created.
If you need to email or print Shot Breakdown PDFs, select the Shots, right-click, and choose “Shot Breakdown”.
Tip: If you have a lot of items to create, you may find it quicker to import the information from a spreadsheet instead.
Note: Although it’s common practice in productions to break down individual Scenes, doing so isn’t necessary in Shotgun, as Sequences provide adequate grouping and will be less likely to change during a shoot.
Track previs
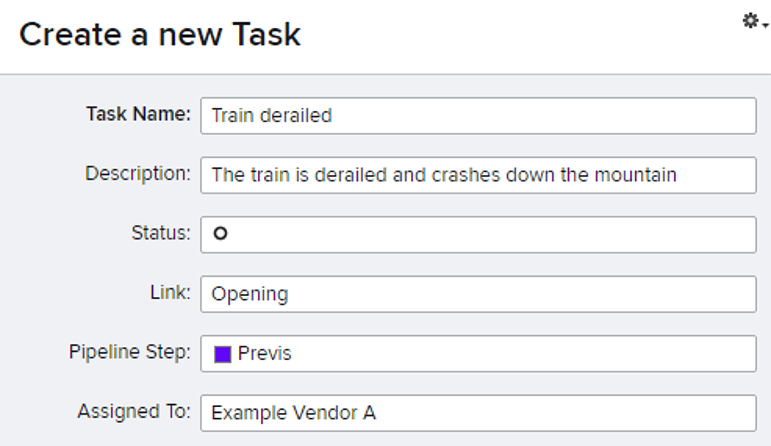
Track previs work by adding Tasks to each Sequence as required, giving them an appropriate name and description, and adding vendors to the “Assigned To” field. Be sure to use the “Previs” pipeline step.
Tip: Use the “Previs Schedule” tab of the Sequences page to quickly add previs Tasks by right-clicking on the Sequence within the previs section, and choosing “Add Task to Selected”
Learn more
- Media app: Browse, manage and review media.
- Working with entities: Create, track and import things.
- Working with Tasks: Tracking with tasks and pipeline steps.
Principal photography
Track live action plates and elements
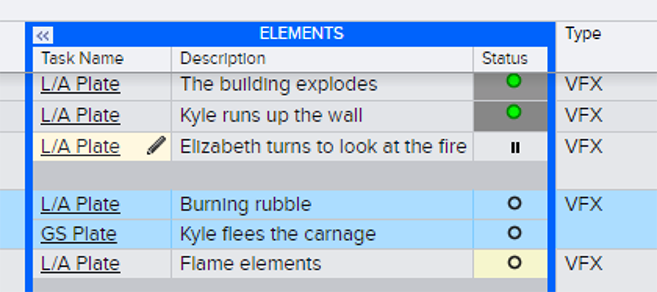
To track live action plates and elements for Shots, simply add Tasks to the Shots, giving them an appropriate name and description. Be sure to use the “Element” pipeline step.

Tip: Use the “Principal Photography” tab of the Shots page to quickly add Element Tasks by right-clicking on the Shot within the Element section, and choosing “Add Task to Selected”.
At the end of the shoot day, verify that all the plates and elements were captured and update details such as the status of the element.
Track LIDAR and cyber scans
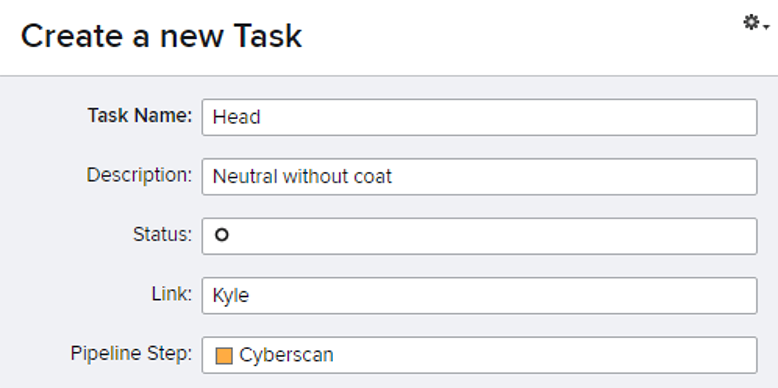
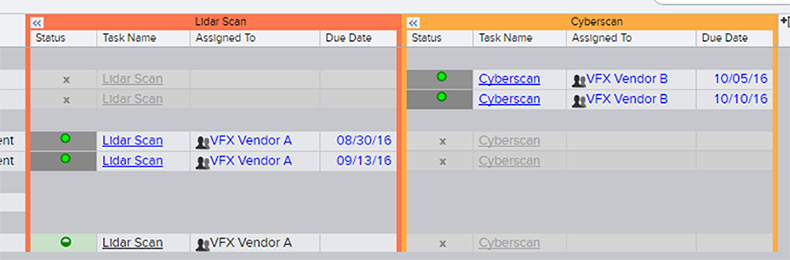
To track LIDAR and cyber scans for Assets, simply add Tasks to the Assets, giving them an appropriate name and description. Be sure to use either the “Lidar Scan” or “Cyberscan” pipeline step as required.
Tip: Use the “Principal Photography” tab of the Assets page to quickly add scanning Tasks by right-clicking on the Asset within the Lidar Scan or Cyberscan sections, and choosing “Add Task to Selected”.
At the end of the shoot day, verify that all the scans were completed and update details such as the status of the scan.
Note: Adding the individual scan files to Shotgun is not recommended, although you might want to keep a note of where they are saved.
Editorial turnover
Prepare Shots for turnover
To begin the turnover process, the Shots to be included need to exist in Shotgun. Create any that haven’t been created previously, by clicking “Shots” from the project navigation bar at the top and then clicking the + Shot button.
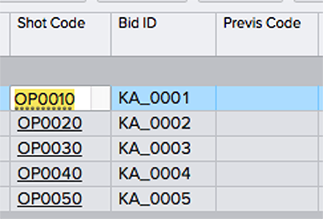
If you’ve been tracking Shots in Shotgun since pre-production, you may need to update the “Shot Code” to be based on the editorial shot names. Use the “Bid ID” and “Previs Code” to keep a record of previous Shot names as required. Other important fields to update for each Shot include “Description”, “VFX Work”, “Sequence”, “Turnovers”, and “Reel”. In particular you can create a new Turnover and associate the Shots to be included with it.
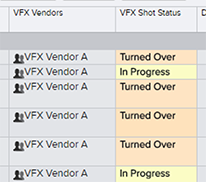
Next you can assign vendors to work on the Shots by adding them in the “VFX Vendors” field, and then set the “VFX Shot Status” as appropriate.
Prepare vendor assignments (Split Shots)
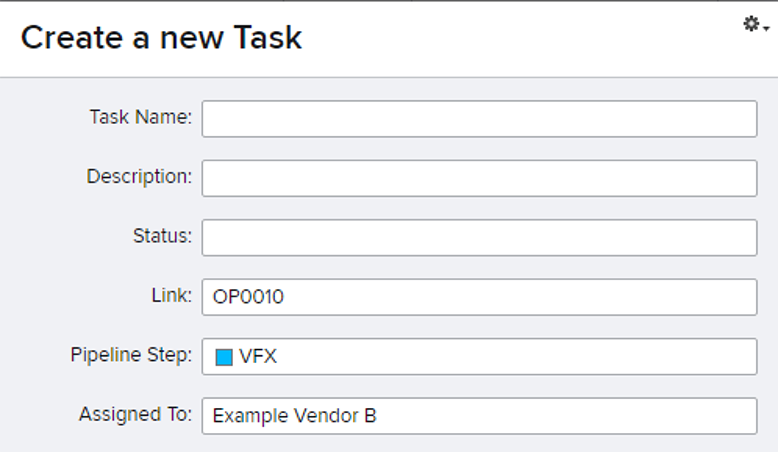
If you will need to track multiple vendors per shot (typically when working with “Split Shots”), you should assign vendors to work on the Shots by adding Tasks. To do this, create a new Task on the Shot, adding the vendor to the “Assigned To” field and making sure to use the “VFX” pipeline step. Once the Task is added, give it an appropriate VFX Shot Status.
In general, you should add one Task per vendor. This will allow you to get the correct Shot count that accounts for split shots.
Tip: Use the “Split Shots” tab of the Shots page to quickly add scanning Tasks by right-clicking on the Shot within the VFX section, and choosing “Add Task to Selected”.
Note: To ensure vendors have access to Shots, each Shot must have a VFX Task that includes the vendor, and the “VFX Status” must be anything other than “Bid In Progress”.
Tip: Shots may also be created automatically when tracking scans, if you prefer to just create them when you need them instead of tracking them in advance.
Tracking scans for turnover
The simplest approach to tracking scans (or “plates”) in Shotgun is to export them out of the editing system and then use the Scan Importer app to create the scans automatically (as Versions of Shots). All you need is a tab-delimited text file from a bin, or an EDL from an Avid Sequence with locators. You can even export thumbnails and they’ll be imported into Shotgun as well.
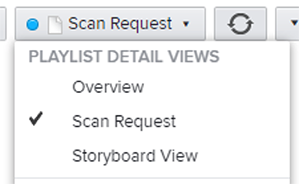
Once they’re in Shotgun, verify the information either from a specific scan request (click on the Playlist for the request, and then switch to the “Scan Request” view) or from the “Scan Requests” page (within the Editorial folder under “Project Pages” in the project navigation), in preparation for submitting the request to a scanning vendor.
Tip: Scans that have thumbnails are automatically used for the Shot’s thumbnail tool. To prevent specific scans from being used for the Shot’s thumbnail, check the “Exclude from Shot Thumbnail” box on the scan.
Requesting and delivering scans
To issue a scan request, you need a Playlist that includes all the scans required. The most convenient way to do this is to use the Import Scan app (which will then create a playlist automatically for all the imported scans), but you can also just create a Playlist and add the scans manually.
Tip: If you create a scan request manually, be sure to set the Playlist’s “Type” to “Scan Request” so it’s easy to find later on.
Either way, once you have the Playlist, launch the Request Scan app generate a Delivery with a CSV and EDL with information for the pulls attached.
Tip: Any recipients for the scan request (for example, at the scanning facility) that have subscribed to Deliveries will get an email notification once the request has been issued.
Generating reports
Many reports can be created in Shotgun as part of the Turnover process, such as “Count Sheets” for Shots, or “Camera Reports” for cameras. To run reports, select one or more entities in Shotgun (such as a Shot or Asset), right-click, and choose the report to run. For more information about the specific reports you can run, see Reporting for Studio Productions.
Tip: For a preview of how a count sheet will look for a particular Shot within Shotgun, click on the Shot and then change the view to “Count Sheet”.
Tracking delivered files
The most convenient way to track files other than plate and element scans (such as concept art, set data, turnover documents, and so on), is to go to the Deliveries page (Other > Deliveries) and create a new Delivery. You can provide a list of files included, as well as reference specific Shots and Versions that are included.
Tip: Any recipients that have subscribed to Deliveries will get an email notification once the Delivery has been created.
Learn more
- Import Scans app: Import plate and element scans and metadata from Avid.
- Request Scan app: Submit plate and element scans to be pulled.
- Reporting for Studio Productions: Generating report PDFs for distribution.
Post production
Managing editorial information
To keep Shotgun up-to-date with editorial changes, you can use the Import Avid Locators app, which will import information such as which Shots are in or out of the cut. For greater control, use the Import Cut app to track changes to cut information across Shots between different cuts.
Note: We don’t recommend trying to store entire editorial “Codebooks” in Shotgun unless you have a pressing need, as doing so can result in a lot of information cluttering the database with very little practical benefit. If you use the Import Scan app, it will automatically create Source Clip entries as needed, based on the information from the editing system.
Inside Shotgun, there are a few key areas to view and keep track of editorial information. For editorial information for Shots, navigate to the Shots page and then click on the “Editorial Info” tab to get an overview of Cut information across Shots.
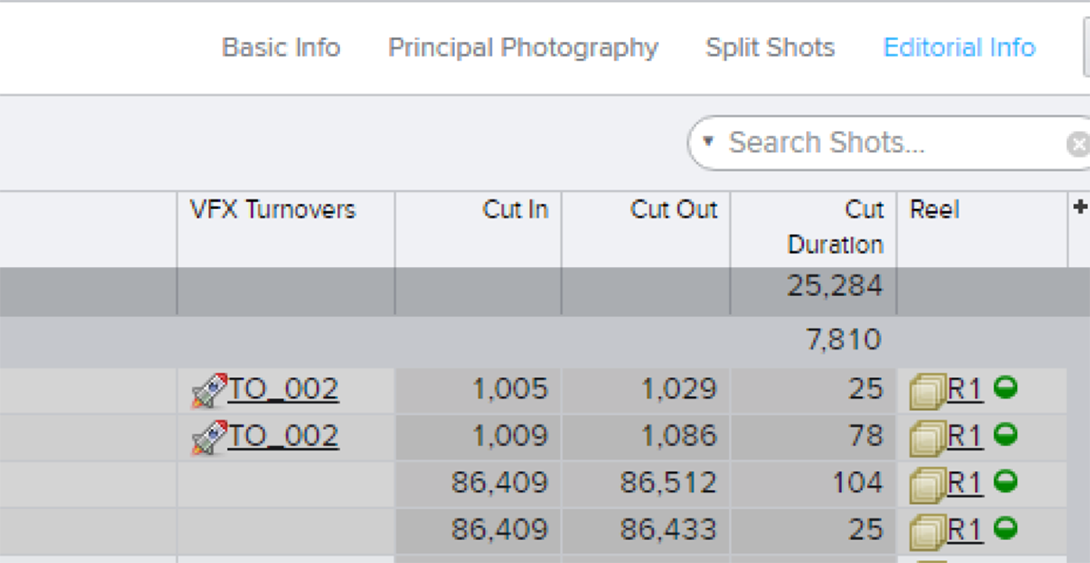
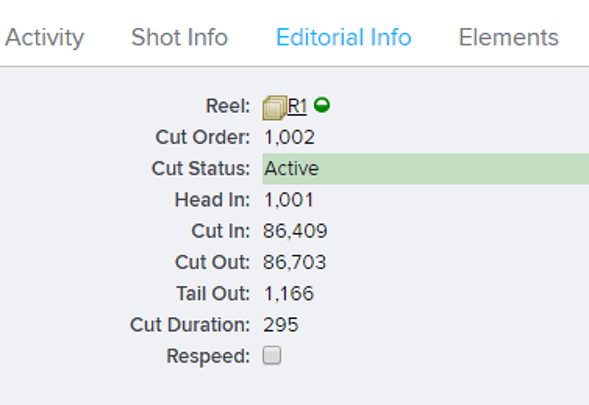
For more detailed information, click on a specific Shot, and then click on the “Editorial Info” tab to see the cut information.
Managing submissions
The vendor submission process is made easier by the Create Delivery and Ingest Delivery apps. The Create Delivery app is distributed to vendors, who then use it to send batches of Versions for review or archive. Once received, the Ingest Delivery app will file the media on local storage and update Shotgun with new Versions, thumbnails, and playback media of everything received. It will also create a Playlist and set RV metadata to allow for convenient review.
Note: The Create Delivery apps may be pre-configured in order to validate that all submissions by vendors adhere to your naming conventions and other requirements.
Reviewing submissions
For quick, convenient reviewing of submissions and other media, click “Review” in the project navigation bar at the top. From here you can see a list of any Playlists you’ve created, as well as those that have been created automatically, such as by the vendor submission apps.
Tip: Create Playlists to organize Versions for a review session with a supervisor or director. You can even change the order of items to be shown, and add the same Version to multiple Playlists.
Click on the “Need to Review” tab to quickly see all Versions that are flagged as “Pending Review”. As they are reviewed, they can be changed to “Viewed”, or if the director needs to see them, to “Pending Director Review”. The “Director Needs to Review” tab will likewise show all Versions that are “Pending Director Review”, and Versions there can then be marked as “Viewed” or “Final Approved” as needed. Final approved Versions can be found in the “Finals” tab, with the most recently added shown at the top.

Tip: If you have an iPhone, be sure to download the Shotgun Review app from the App Store.
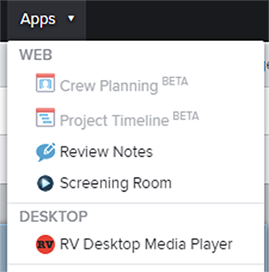
You can playback media proxies directly in Shotgun, but if you prefer to play back the original full-resolution media, you can use RV. You can install RV from the Apps menu at the top.
Either open RV and connect to your Shotgun site and begin browsing for Playlists and Versions, or select some Versions in Shotgun, right-click, and choose “Play in RV”. In RV you can (where available) switch between different formats of Versions, such as Quicktimes or EXR image sequences.
To record feedback for items in a Playlist, right-click the Playlist and choose “Launch Review Notes App”. The Review Notes app lets you easily add notes to each Version in the Playlist as well as providing quick access to information about each Version such as related Versions, Tasks, and Notes. When you’re ready, you can publish all the notes, optionally sending feedback directly to the vendors by email.
Copying media
At various points it becomes necessary to make copies of media to send to others, or for archive and backup purposes. For media tracked within Shotgun, the Copy Media app can be used. Select the Versions you want to copy, right-click, and choose “Copy Media”, and from there you can choose which of the available file formats to copy, and where to copy everything to, saving you from having to navigate through folder structures to find the files to copy.
Tip: The Copy Media app can also be configured with templates to use which affect how the folder structure of the copied files will be organized.
If you have EDLs you need to send, you can use the EDL+CDL app to update those EDLs with ASC_SAT and ASC_SOP data from Shotgun.
Tracking progress
As the production moves toward completion, it’s necessary to keep track of what’s been done and what’s left to do across potentially thousands of Shots. As Versions are finalled, automation built-in to Shotgun will update corresponding Shots to indicate they have been finalled, and in other instances the “VFX Shot Status” for each Shot can be updated to reflect how far along it is.
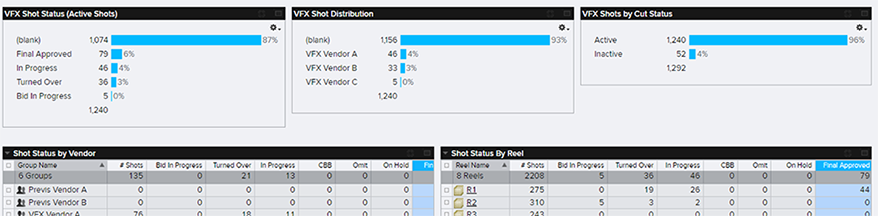
To get an overview of the status of the production, go to the “VFX Dashboard” (found in the project navigation bar at the top), which shows breakdowns of Shots across reels, sequences, and vendors.
Learn more
- Avid Locator Importer app: Import and maintain basic editorial information for Shots.
- Import Cut app: Import and maintain detailed editorial information.
- Vendor submissions: Automate processing of files from vendors.
- Review Notes app: Record and distribute review feedback
- Review process: Organize review sessions and distribute feedback.
- Tracking statuses: Work with and extend Shotgun’s built-in statuses.
- Screening Room: Use Shotgun and RV to review media.
- Shotgun Review for iPhone: Review media with the iOS app.
- Copy Media app: Copy tracked local media.
- EDL+CDL app: Attach CDL information to EDL files.