Return to Step 03 - Aspera Setup Menu
Using Aspera on Cloud with Create Delivery2
GPL’s integration between Aspera on Cloud and the Create Delivery2 app for Shotgun is intended to automate the submission process between vendors and production.
This tutroial will walk you through how to setup and add your Aspera on Cloud credentials to Create Delivery2 app.
Aspera Setup Workflow:
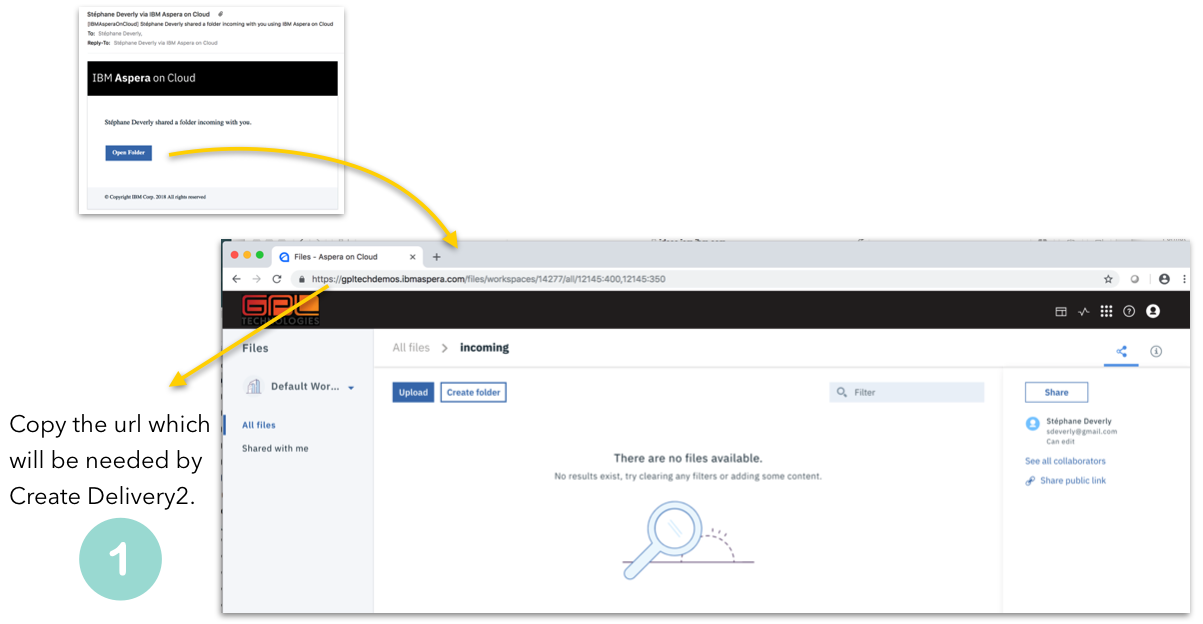
- User receive an invitation email from Aspera to use a shared folder.
- User clicks on the “Open Folder” button in the email and follows instructions.
- User copies the folder url to use it in Create Delivery2.
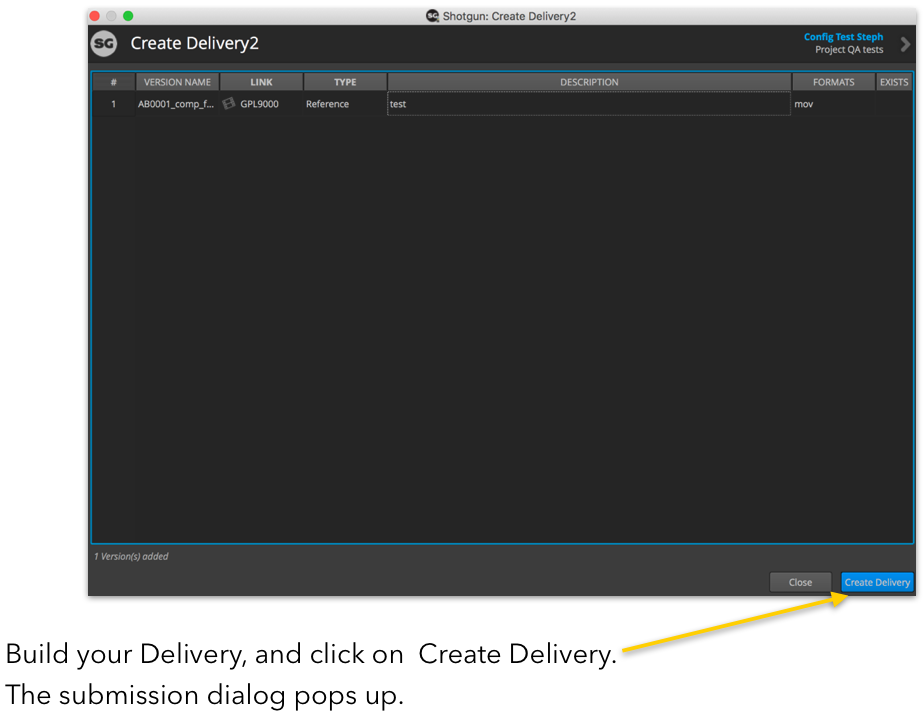
- User creates a delivery and click on “Create Delivery”.
- User sets the target folder url and their login in the UI.
- User generates a public and secret key pairs and updates their Aspera on cloud account with the public key.
- User validates their credentials and submits the delivery.
Aspera Setup Instructions:
1 Login to Aspera on Cloud from the invitation email and follow IMB Instructions
2 Launch Create Delivery2 from the Shotgun Desktop
- Add your files to the delivery
- Click Create Delivery and wait for the submission dialog to pop up
3 Input your Aspera credentials
- Select Delivery Method “ASpera Files”
- Paster URL from Step 1
- Enter your email associated with your Aspera on Cloud account
- Click ‘Get my account key’ and wait fo ‘Secret Key Picker’ dialog box to open

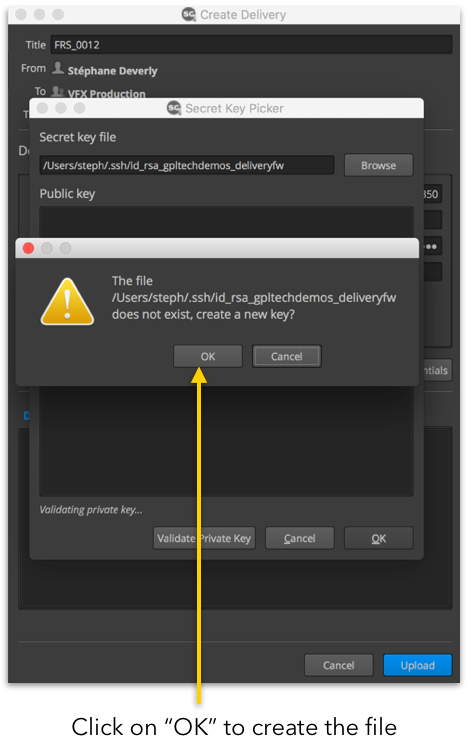
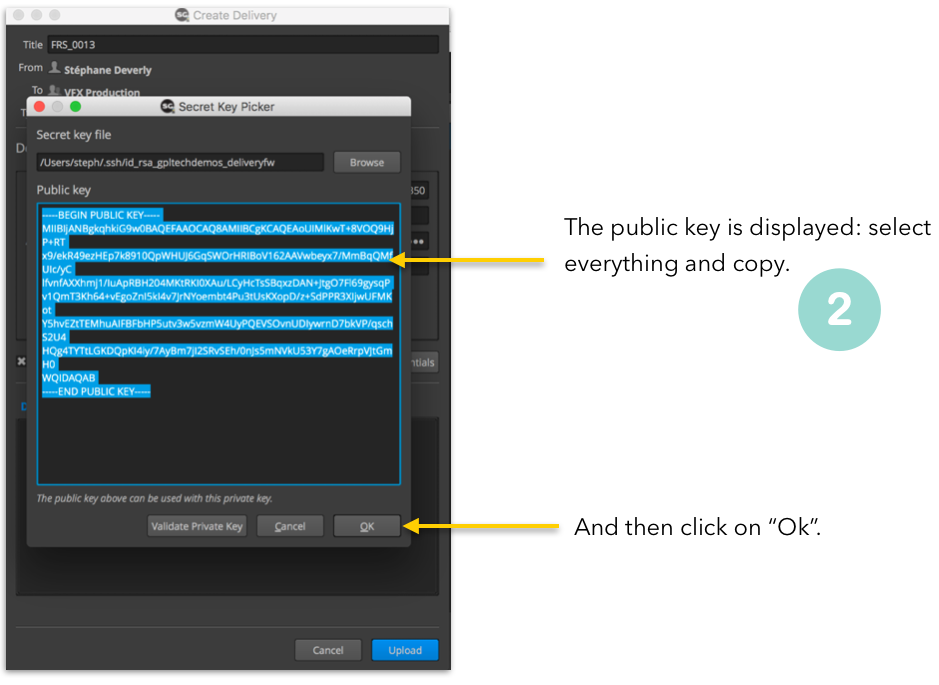
4 Validate your private key
- Click on “Validate Key
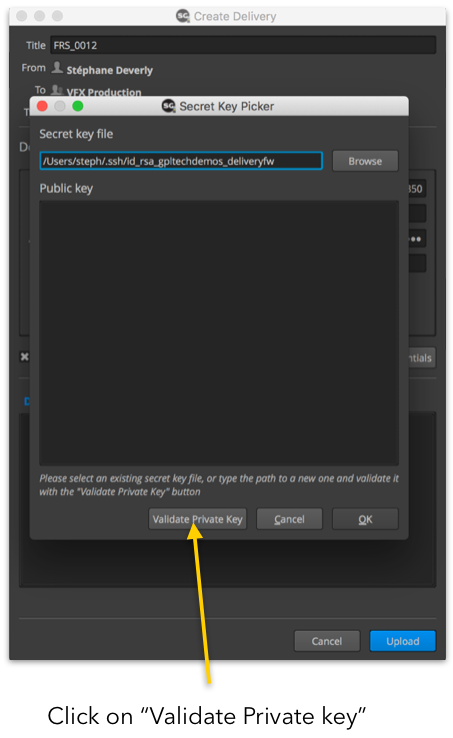
- Click on ‘OK’ to create the file
- Copy the public key and click ‘OK’
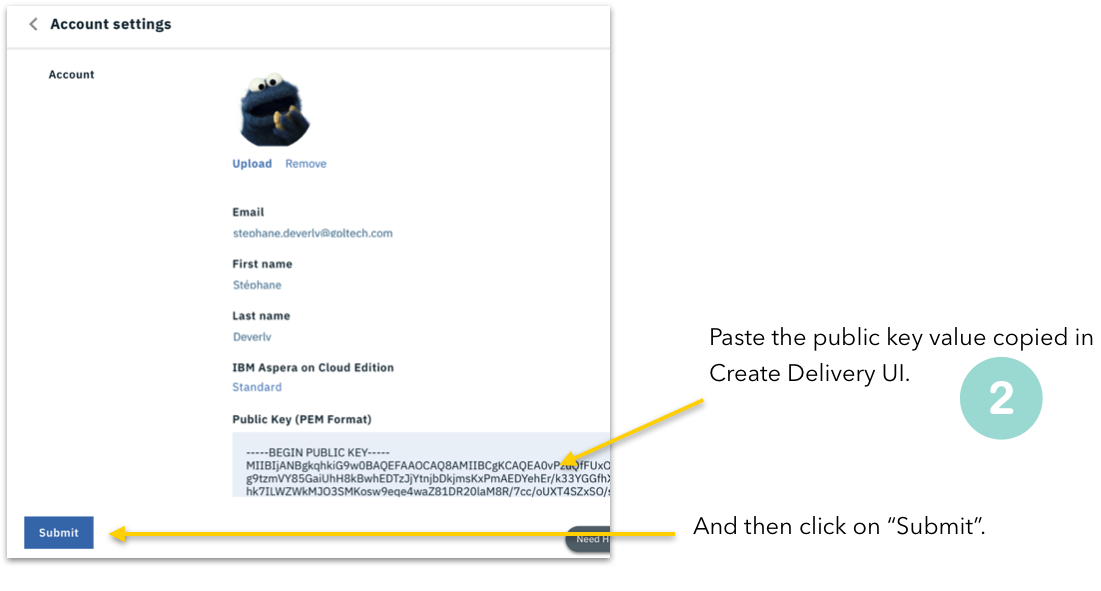
5 Go to your Aspera on Cloud Account settings

- Paste the public key value copied from step 4
- Click ‘Submit’
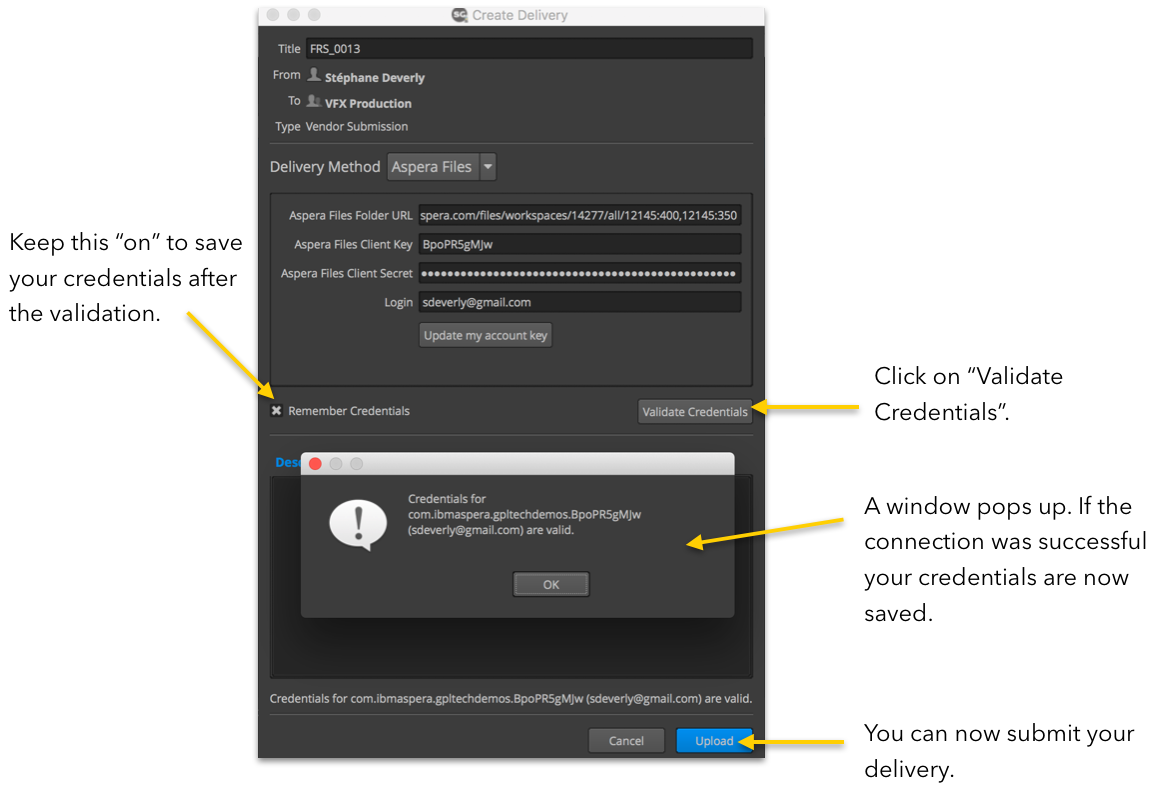
6 Return to Create Delivery to complete submission
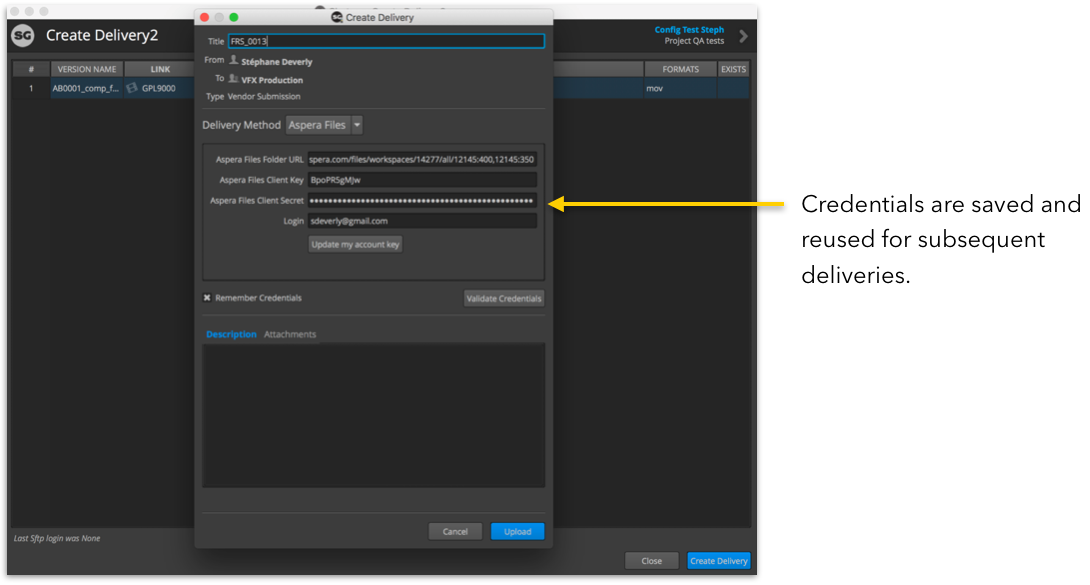
- Select ‘Remember Crednetials’ to save for future use
- Click on ‘Validate Credentials’
- Click ‘OK’ on pop up confirming credentials
- Click ‘Upload’ to submit your delivery
Future Deliveries
If you selected ‘Remember Credentials’ they will be saved for future deliveries and you will NOT have to go through these steps again.