Import Media App
GPL’s Import Media app for Shotgun helps you take a batch of media files and efficiently get it into Shotgun, including:
- Adding entries in Shotgun about the media
- Creating thumbnails and web-playable media in Shotgun
- Adding the submitted media to a Playlist in Shotgun for review
- The process is simple: you open the app, drag the media you want to import, and then provide any additional information about the media. The app takes care of the rest.
Overview Video
The video above shows a quick overview of the workflow for Import Media.
Importing media
To import media into Shotgun, either:
- Open the Shotgun Desktop app, browse to your project, and click “Import Media”, or
- Choose Project Actions > Import Media in your browser, from any page in your Shotgun project.
Note: You must have the Shotgun Desktop app installed. For more information about the Shotgun Desktop app, see Getting started with Shotgun Desktop.
The Import Media window will be shown:
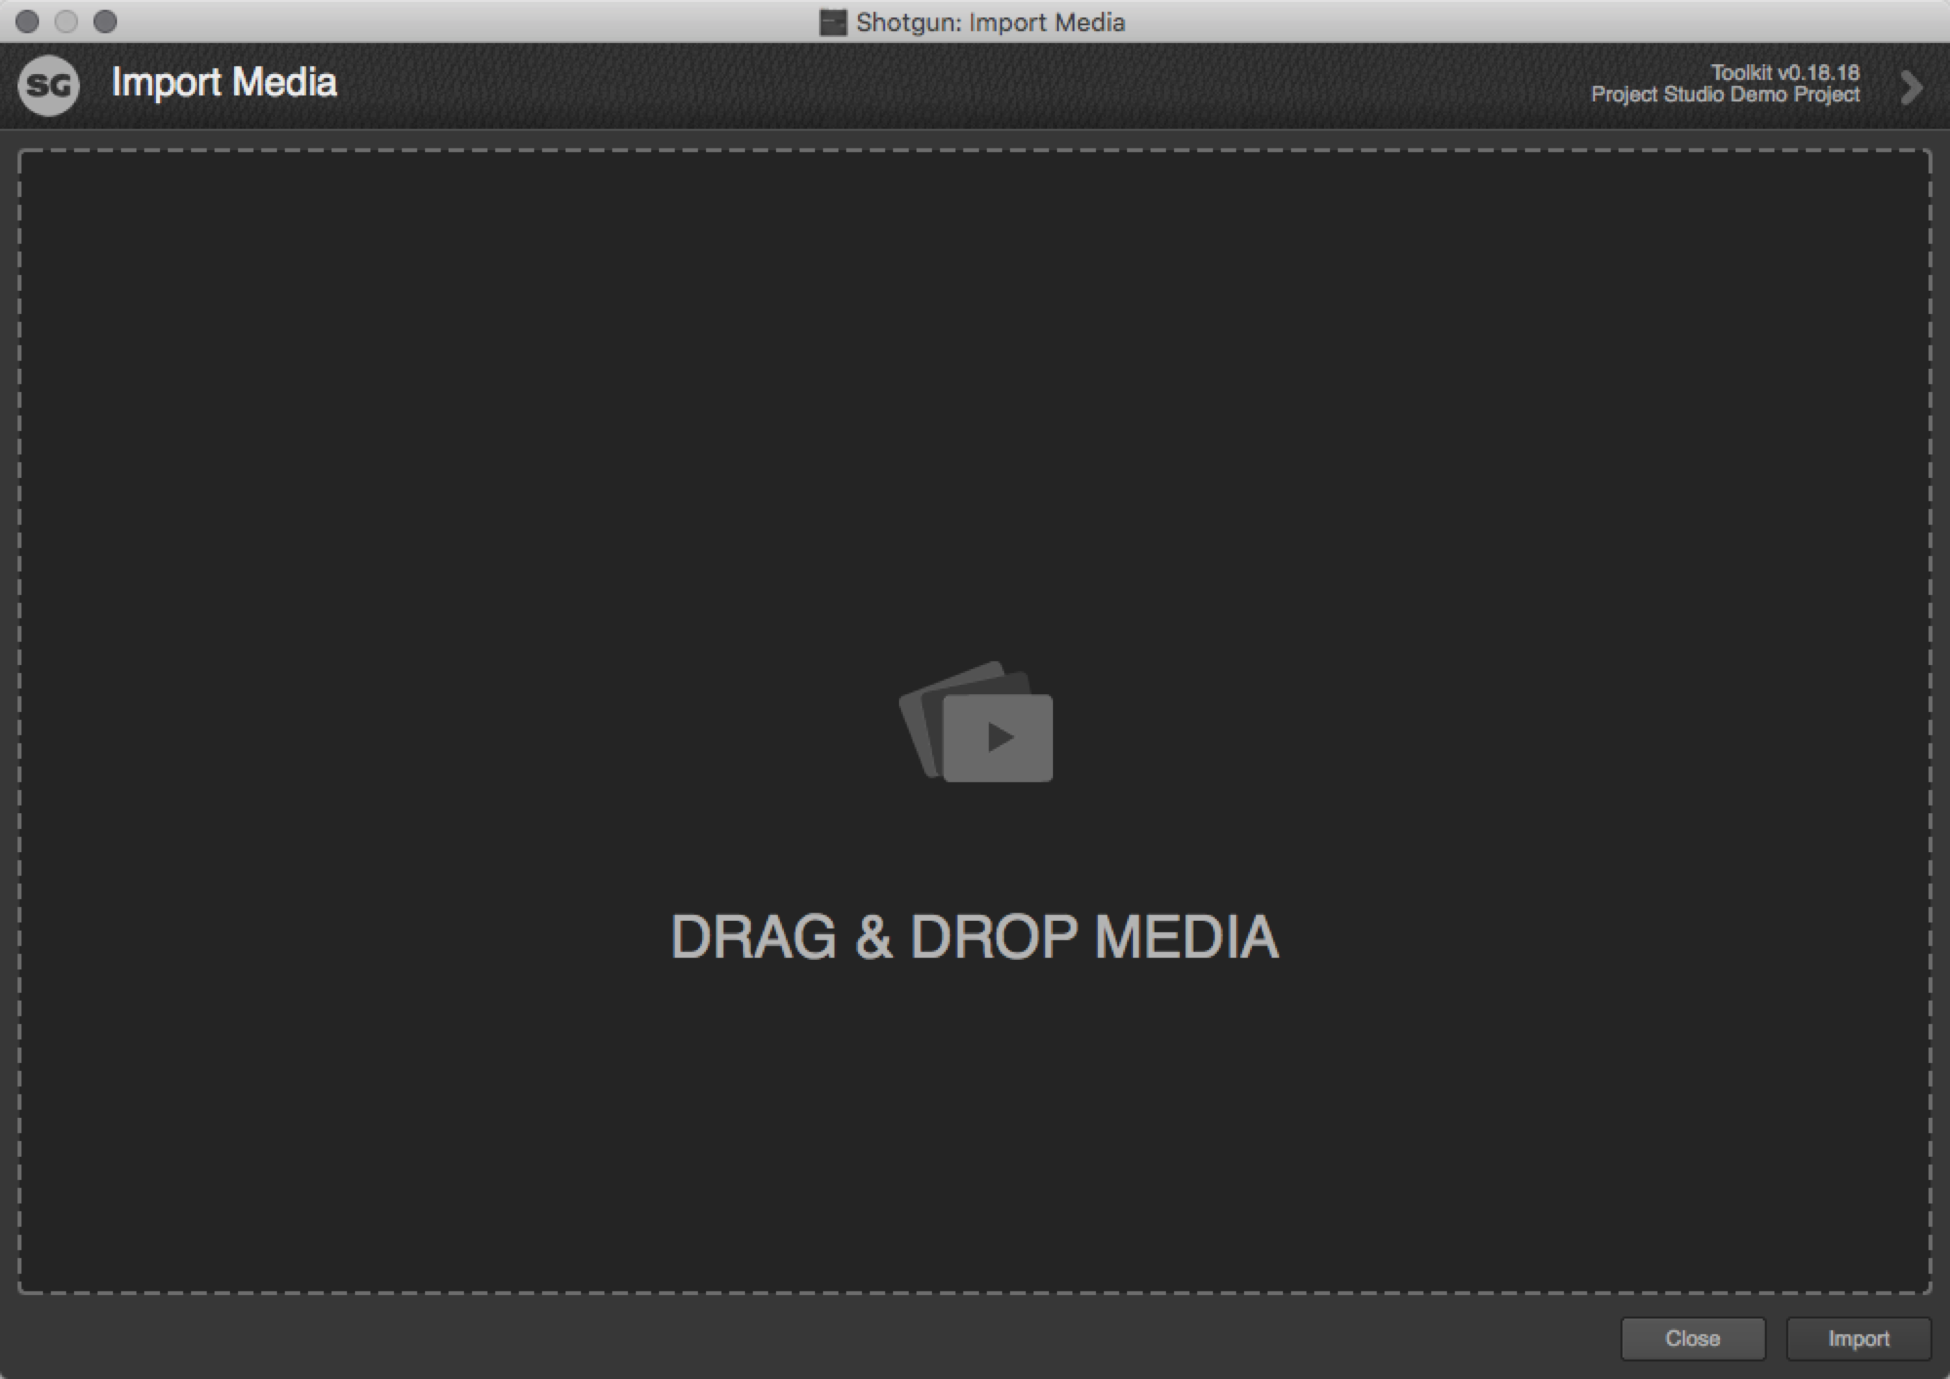
To add media to import, drag the files onto the window. As soon as you’ve added at least one file, the window will change to show a list of Versions for those files.
Note: You can only add media from locations defined in Shotgun’s local storage.
Note: Because the window displays Versions instead of individual files, the number of Versions may be lower than the number of files you’ve added. To confirm how many different file types are being delivered for each Version, check the “Formats” column.
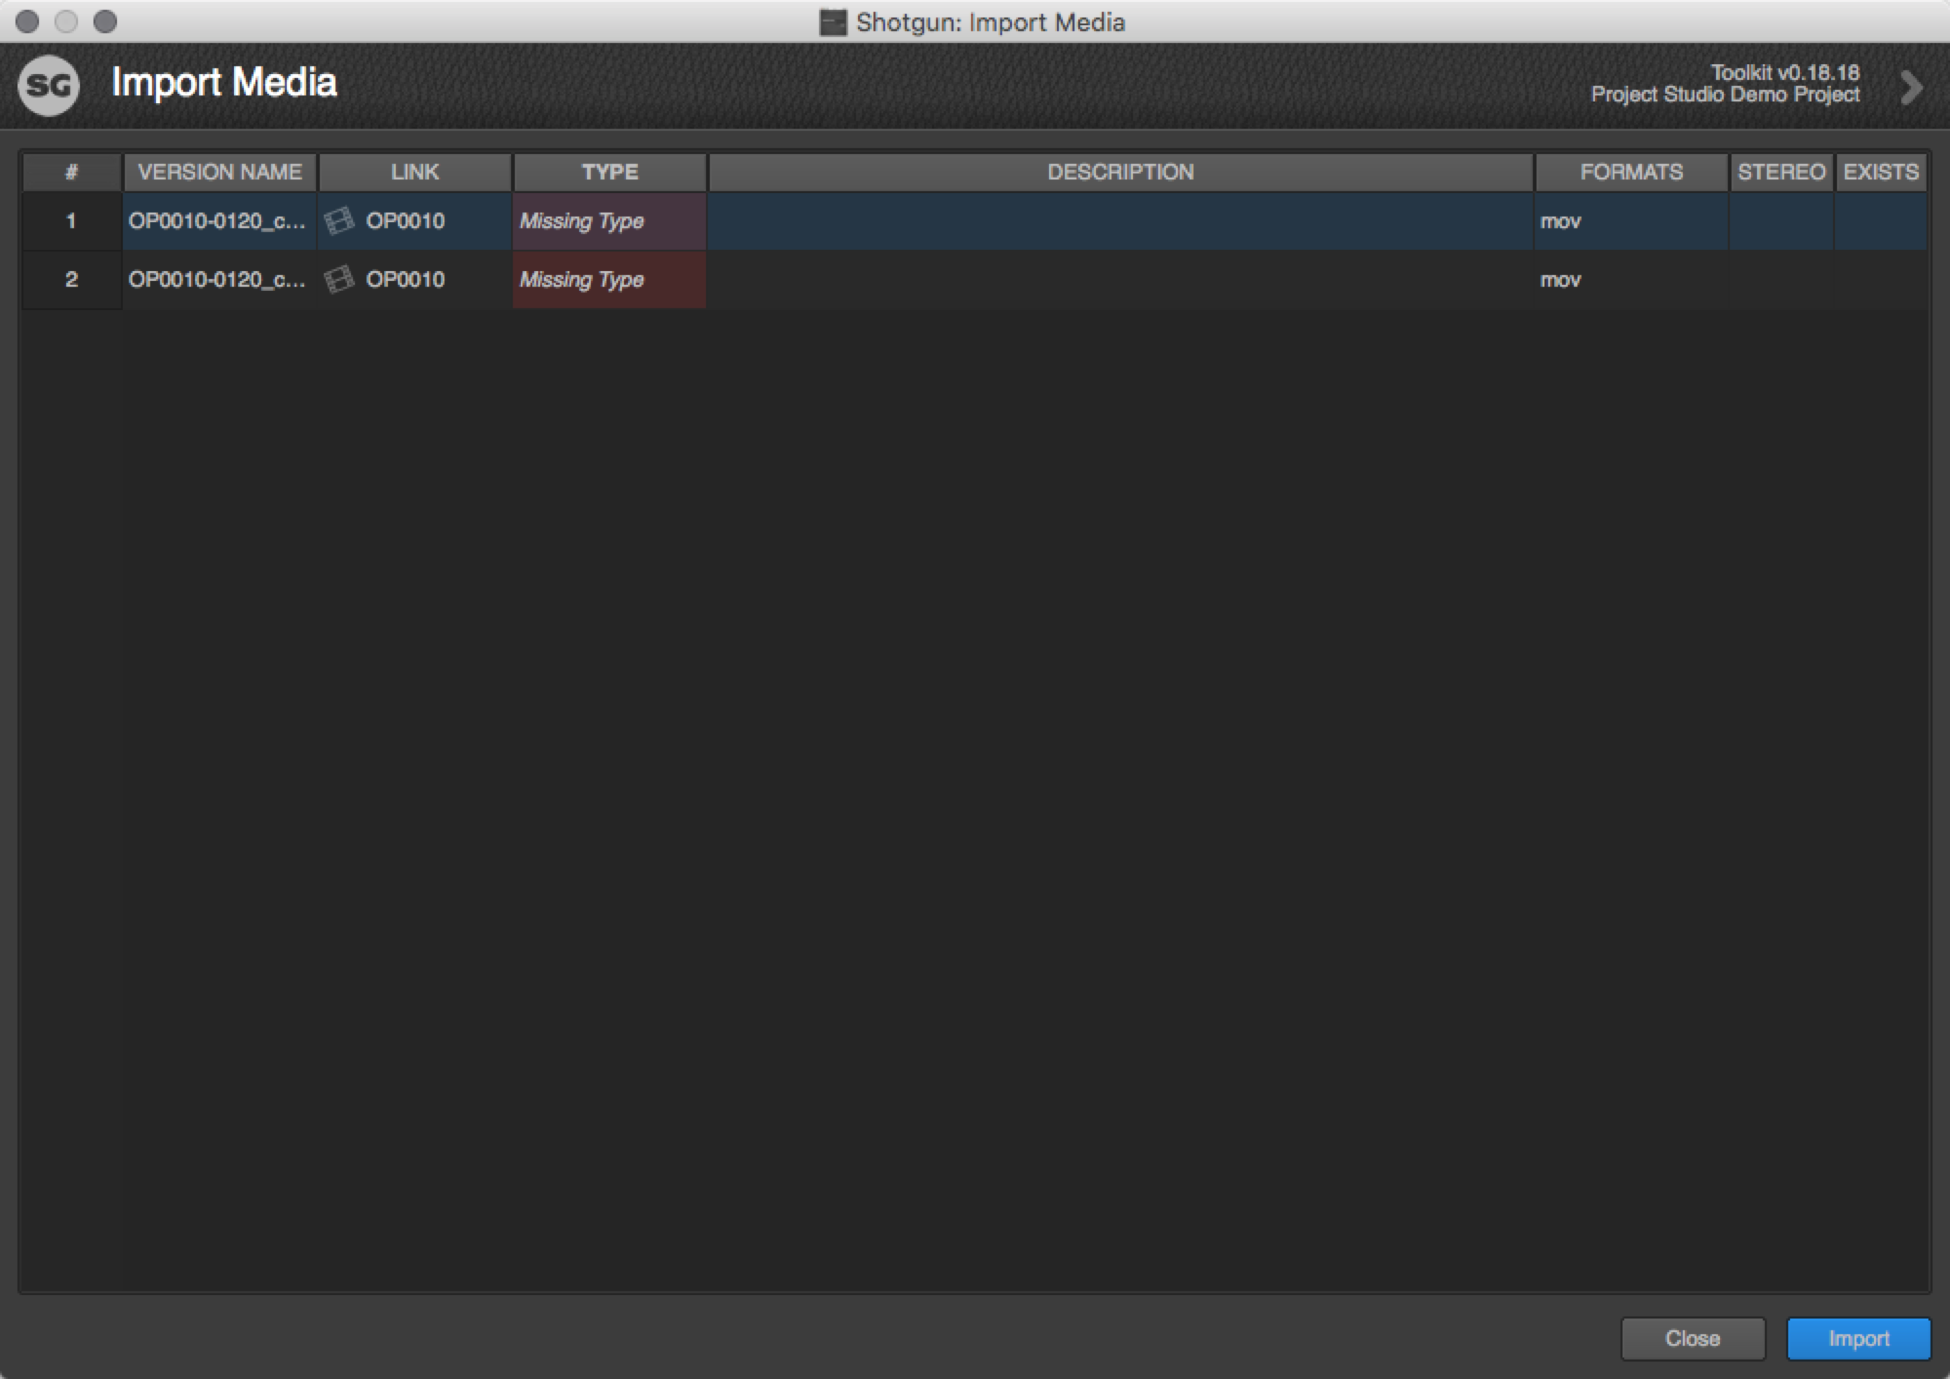
From this view you can:
- Add more media by dragging onto the window
- Edit the metadata shown by clicking into the cells
- Continue with the import
Editing metadata
The various columns represent various metadata that can be edited for each Version imported. The specific columns available to edit will depend on the how the app has been configured. To edit the metadata, click in the cell to edit and make changes. Where possible, a list of options will appear in a drop-down.
Tip: To batch-edit a single column for multiple Versions, first select the Versions to change, then click in any cell in the column you wish to change, and set the desired value. Then click into a different column and the values will all update.To remove Versions from the list, select them, right-click and choose “Remove Selected”.
Tip: The “Link” column may be automatically filled in based on the filename of the media, in accordance with the naming conventions set out by the production. For example, if a Version is named “186_MM_8200_v001”, it would be automatically linked to an existing Shot called “186_MM_8200”.
Note: The “Formats”, “Is Stereo”, and “Exists” columns are for information purposes only and cannot be modified.
Continuing with the import
Once you added all your media and filled in the columns as required, click Import.
Note: The Import Media app may be configured to validate that imported files follow specific naming conventions, or to make certain metadata fields mandatory, which means the media cannot be imported until the required information is provided.
A summary will be shown.
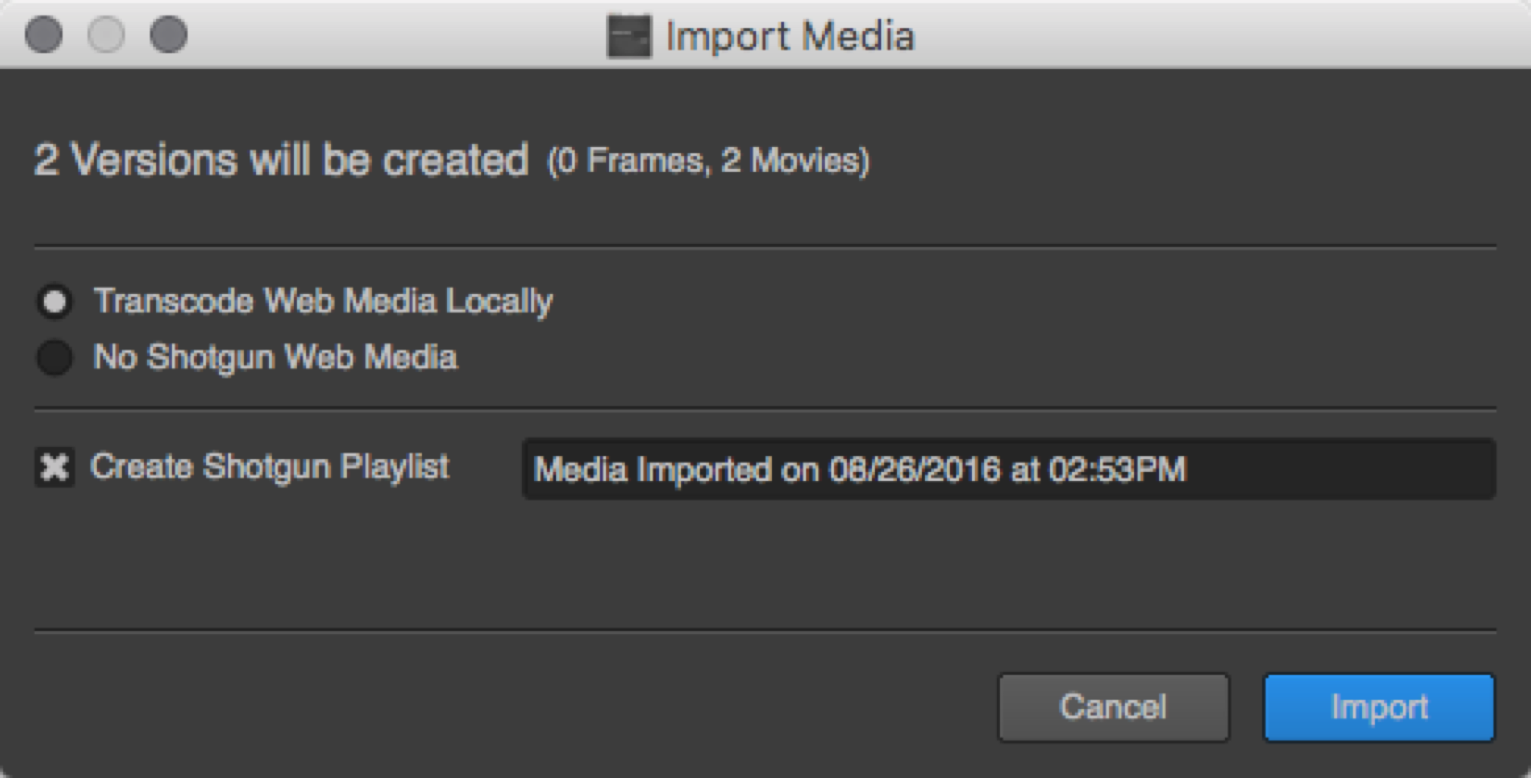
- To have the app process and upload thumbnails and web-playable media, check “Transcode Web Media Locally”
- proceed without generating thumbnails or web-playable media, check “No Shotgun Web Media”
- create a Playlist in Shotgun with the imported media, check “Create Shotgun Playlist” and set the Playlist’s name
- import the media into Shotgun, click Import. The app will process and import the media into Shotgun.
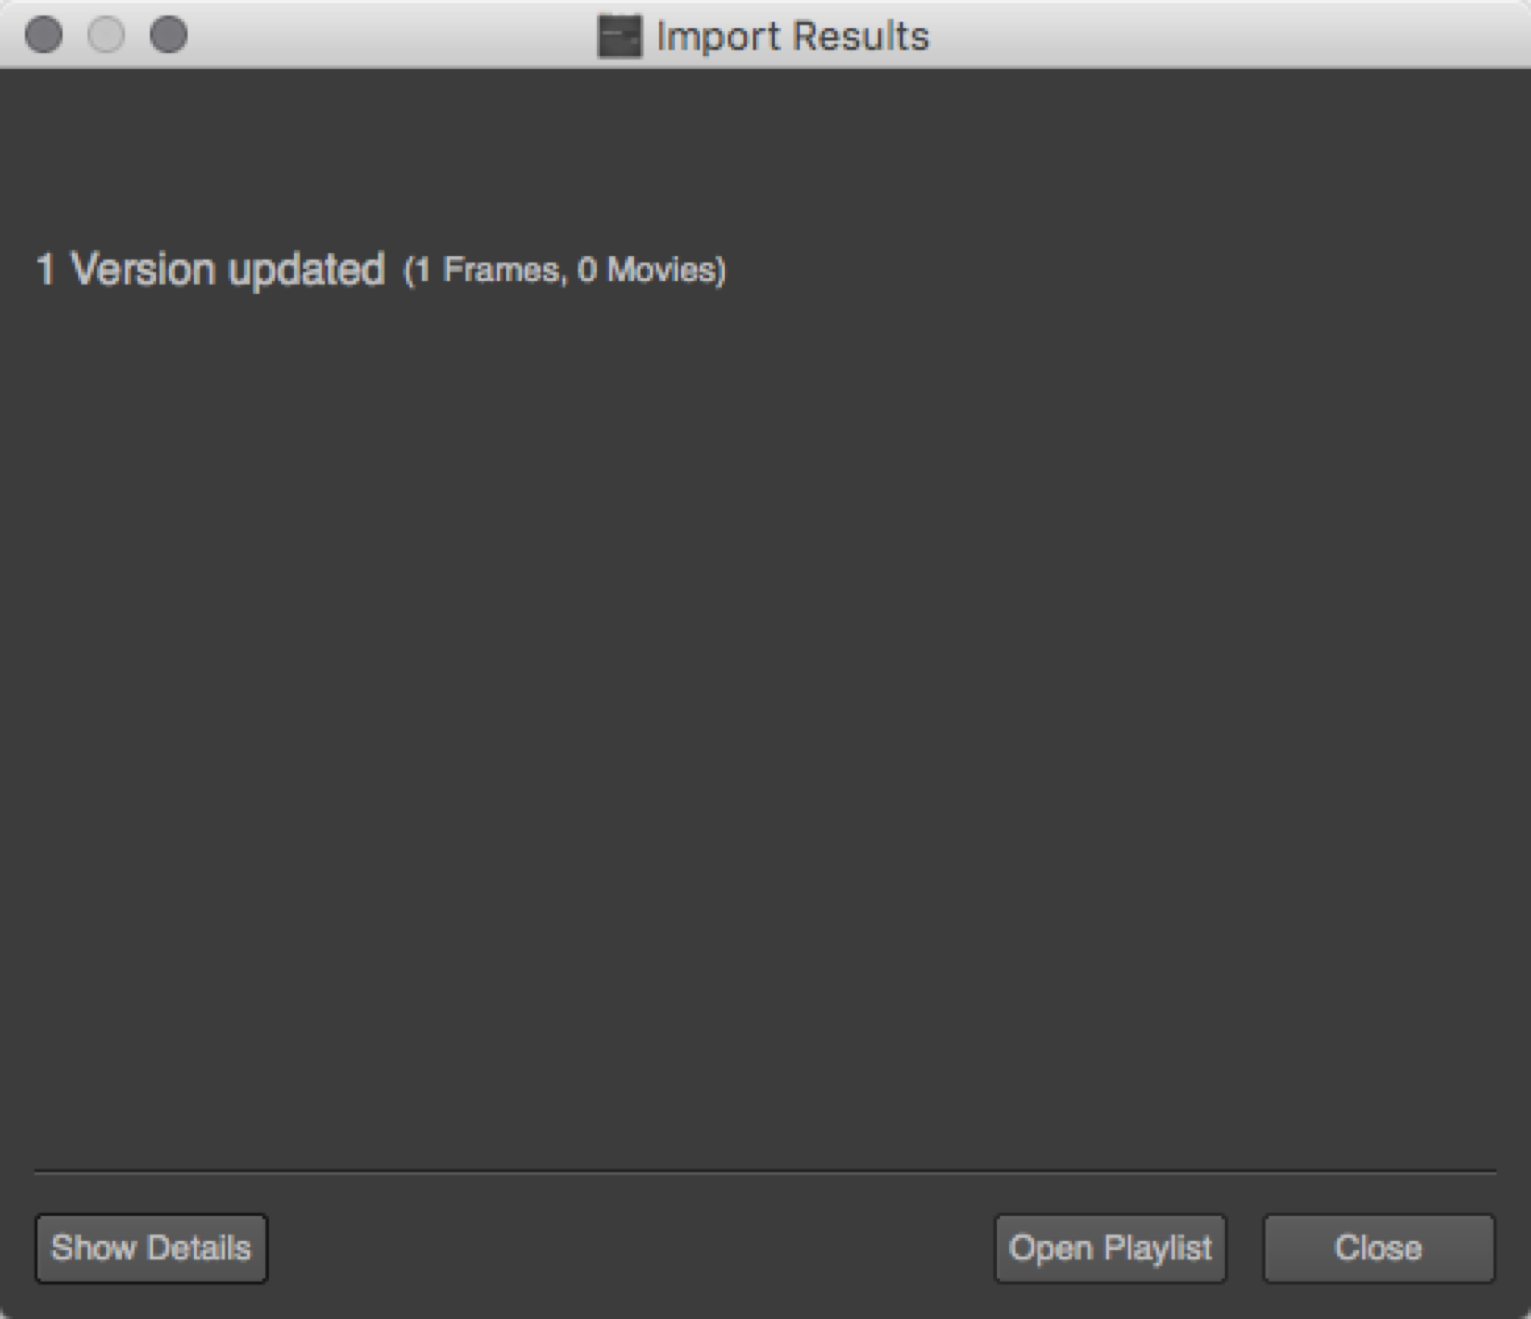
Once the import is complete, you can click “Show Details” to view a summary of the processed files, click “Open Playlist” to view the created Playlist in Shotgun (if one was created), or close the app.