Create Delivery 2 “Local Delivery”
GPL’s Create Delivery app for Shotgun is intended to streamline the submission process between vendors and production.
In some cases Production will receive submissions from vendors who have NOT used the Create Delivery app. We recommend using the Create Delivery app in LOCAL mode to ingest these submissions so they are tracked in Shotgun like all other deliveries.
This page includes detailed instructions on how to use the Creat Delivery app in “Local” mode.
Let’s get started!
Preparing the Submission
To get started, first make sure you have:
- all the files to include in the submission
- any additional information about them, such as any notes, or what they’re being submitted for. This information can be saved in a CSV file, or you can enter it directly into the app later.
Note: The Create Delivery app may be configured to validate that submitted files follow specific naming conventions, or to make certain metadata fields mandatory, which means the files cannot be submitted until the required information is provided.
Launch “Create Delivery 2” App
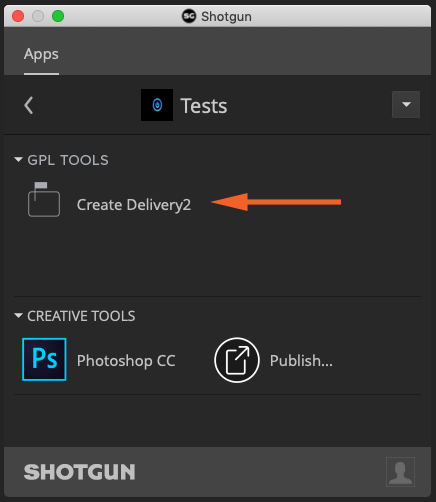
To launch the app, open the Shotgun Desktop app and sign in to the Shotgun site you want to submit files to, select the appropriate project, and then click on the “Create Delivery 2” icon:
Note: If you haven’t installed Shotgun Desktop, follow these INSTRUCTIONS
Submitting to Shotgun
When the Create Delivery window opens you can begin submitting your files.
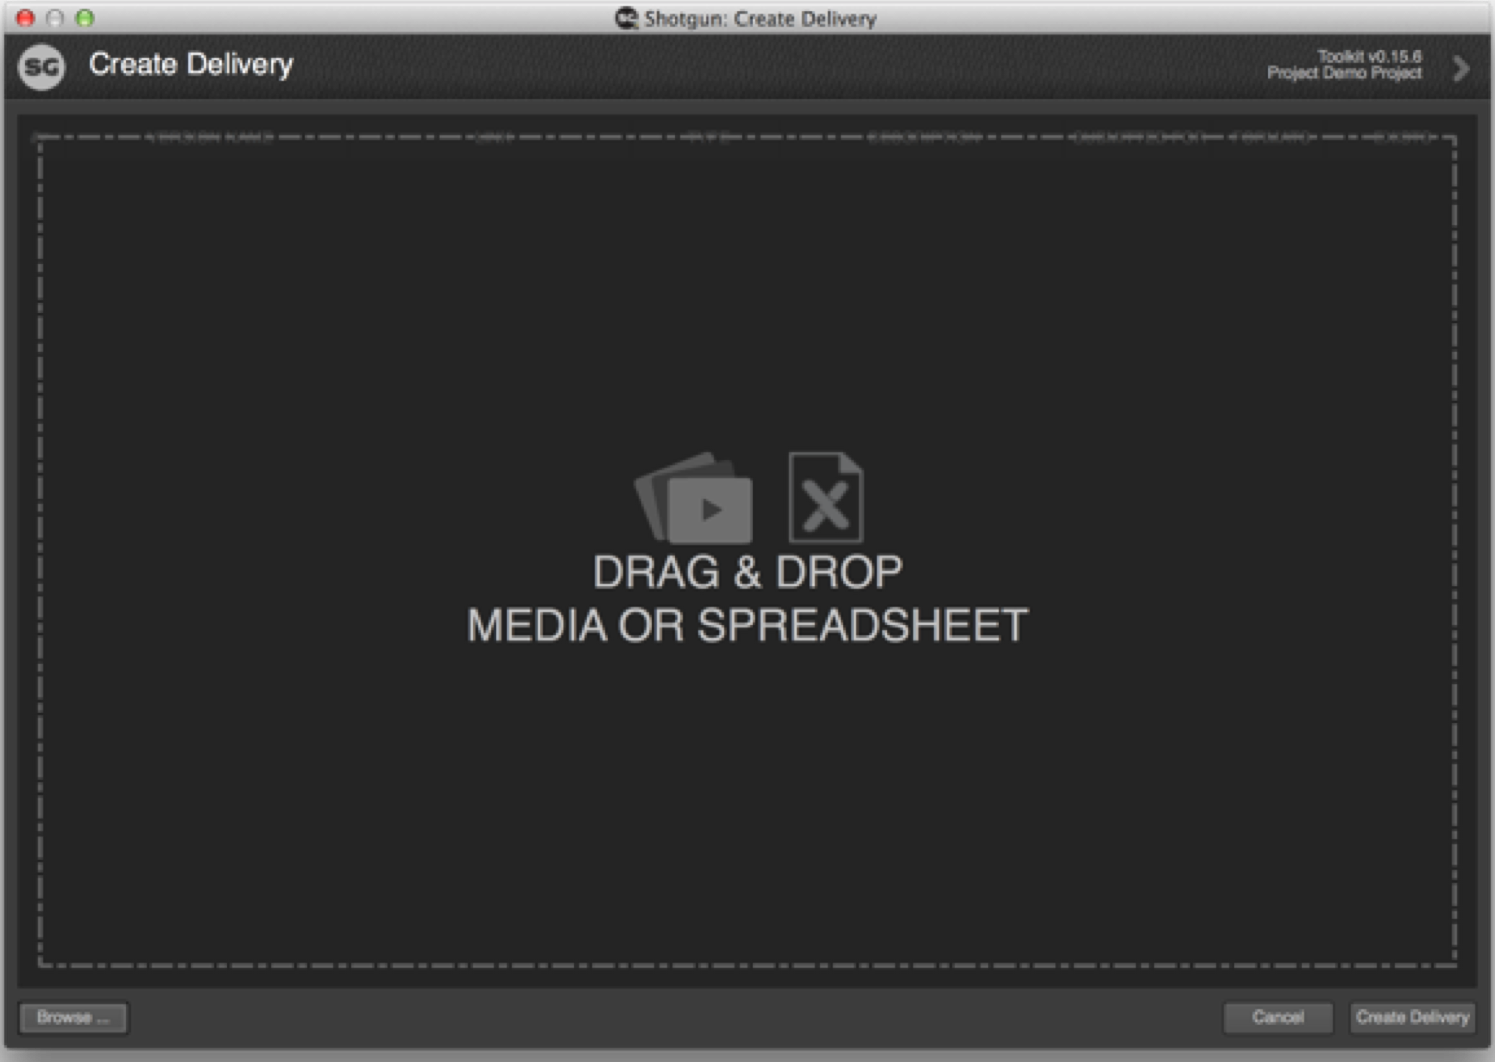
To add the files to the delivery, either:
- Drag the individual files for the delivery onto the window, or
- Drag the folder of all the files for the delivery onto the window, or
- Click “Browse…” and then choose the files to send.
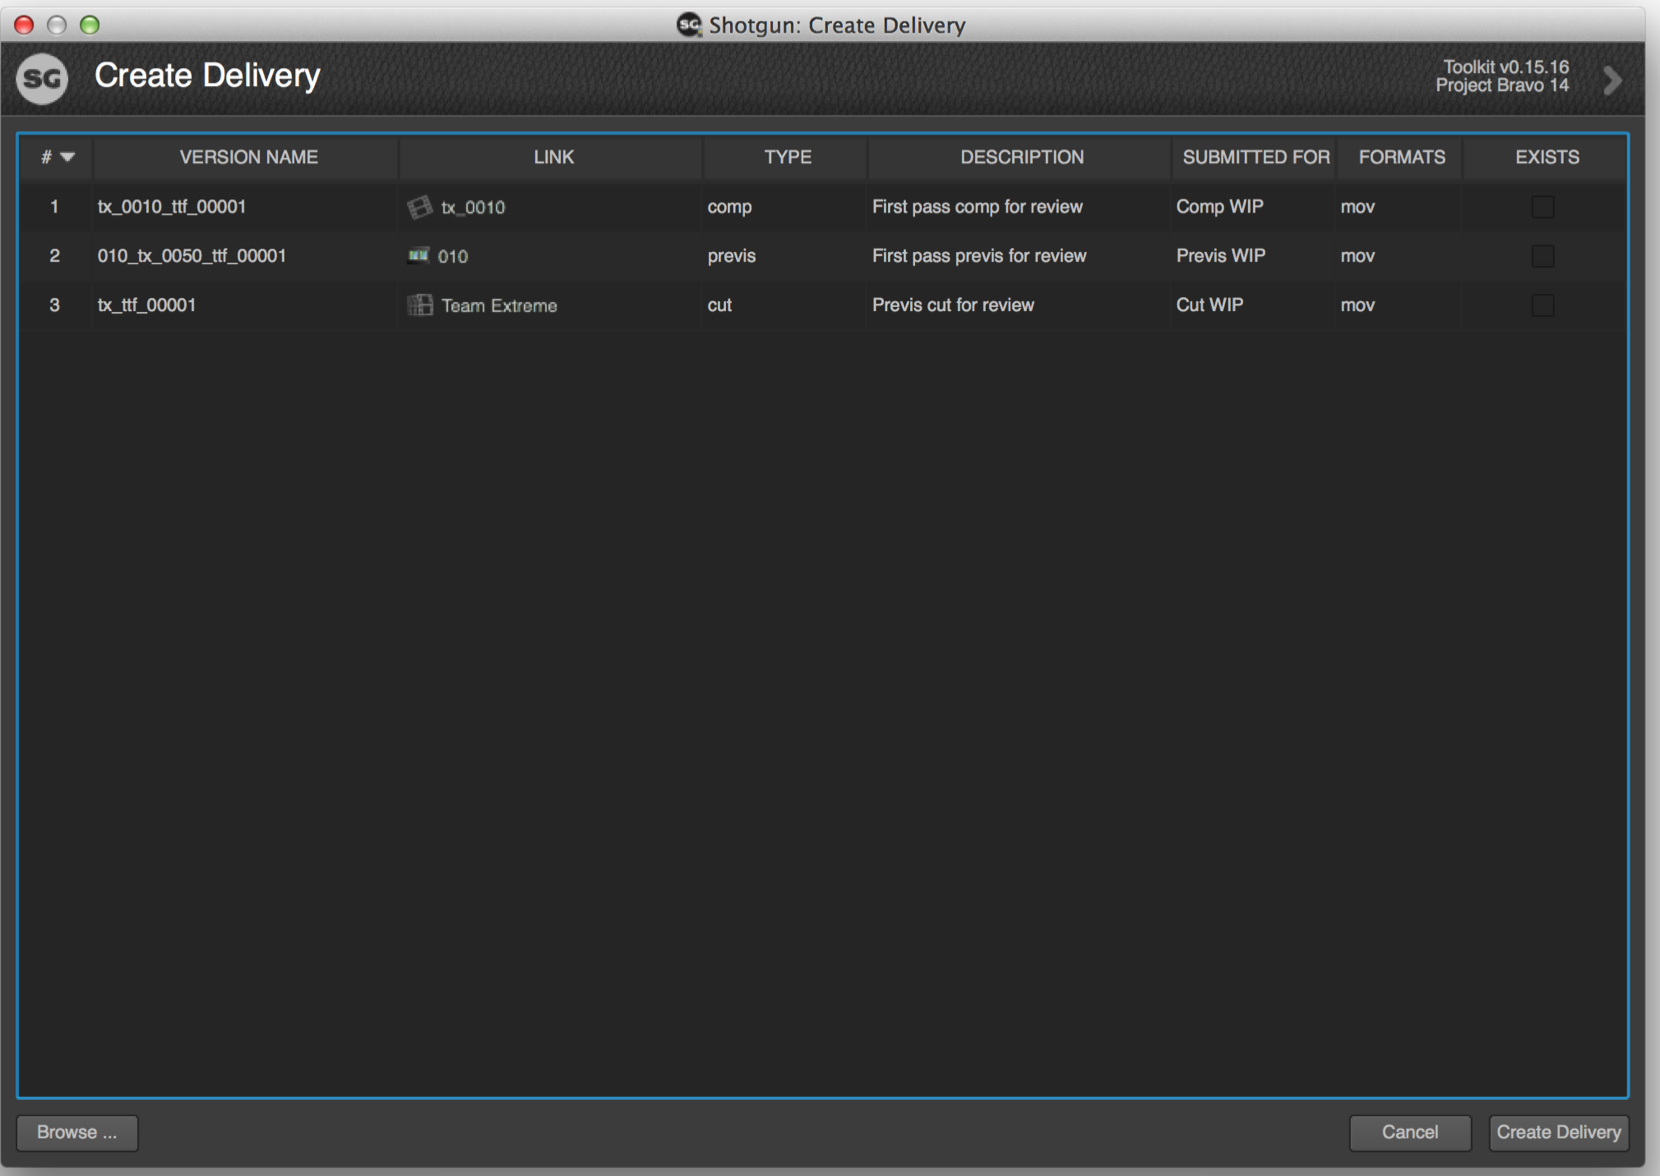
As soon as you’ve added at least one file to send, the window will change to show a list of Versions for those files.
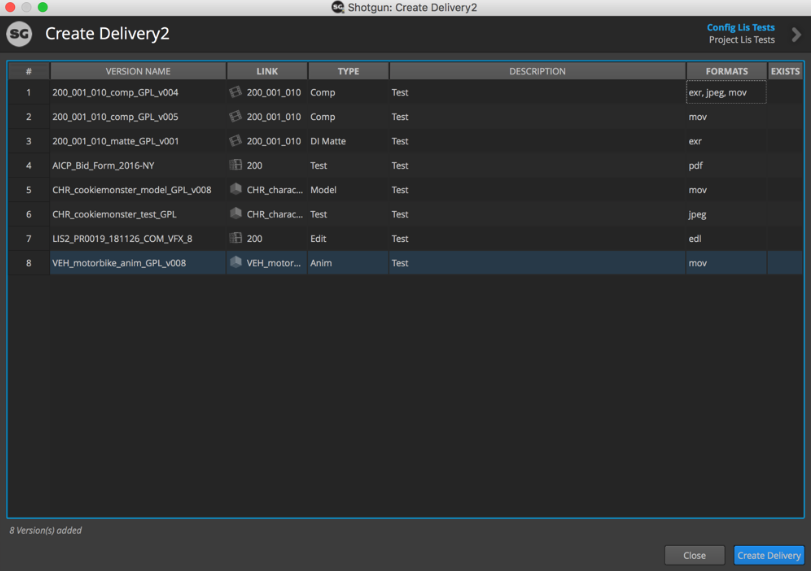
Note: Because the window displays versions instead of individual files, the number of Versions may be lower than the number of files you’ve added. To confirm how many different file types are being delivered for each Version, check the “Formats” column.
From this list of Versions view, you can:
- Manually edit the metadata listed in each field by clicking into the cells
- Add more media (either dragging more media onto the window, or by using the Browse… button)
- Import metadata from a CSV file
- Create the delivery
Manually Editing Fields
The various columns represent metadata that can be edited for each Version submitted. The specific columns available to edit will depend on the requirements of the production. For example the Production Team may want their Vendors to provide submission notes under the “Description” field with each entry.
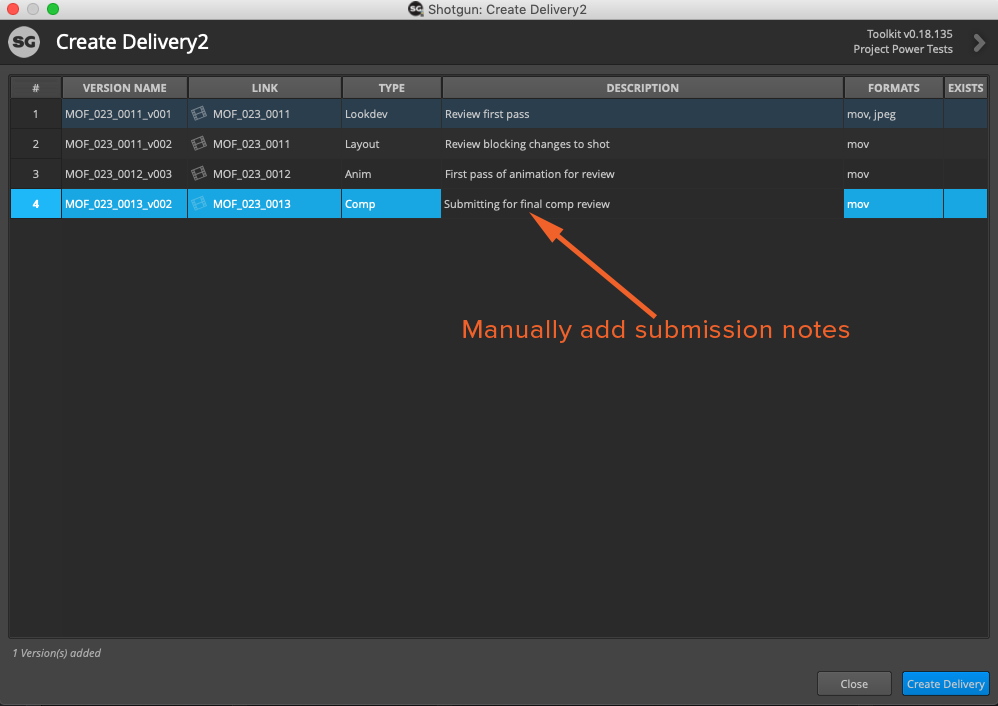
Note: The “Formats” field autopopulates based on the file format (i.e. JPG, EXR, etc). The “Exists” field is flagged if you are trying to send a version that has already been shipped and the new file will overwrite the existing one.
To edit the metadata, click in the cell to edit and make changes. Where possible, a list of options will appear in a drop-down. You can also batch edit fields by selecting multiple entries.
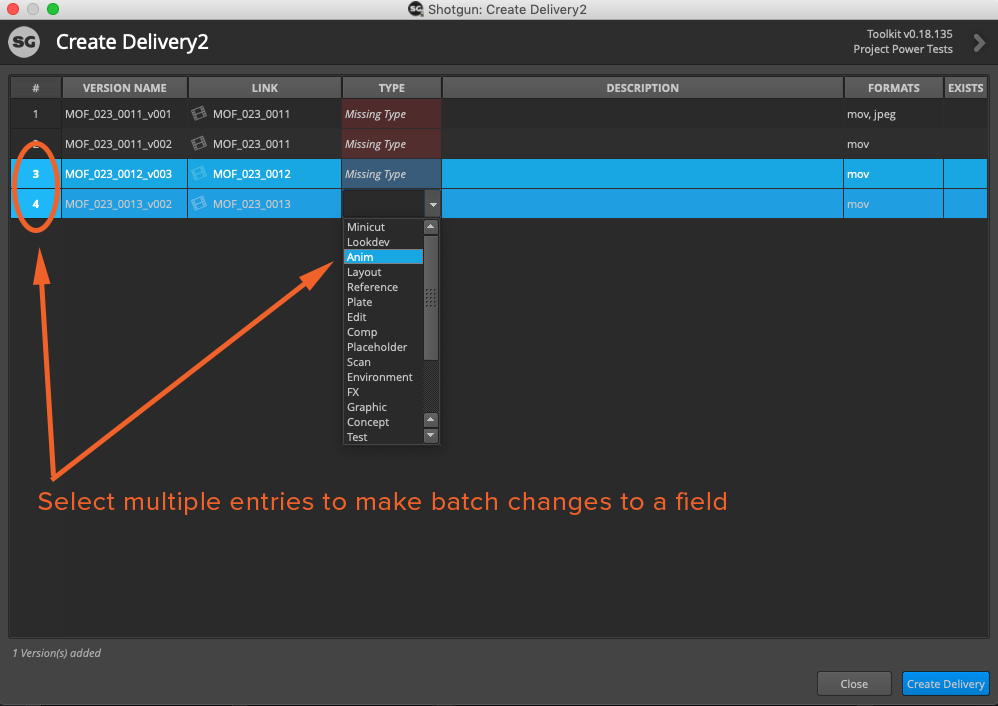
Tip: The “Link” column may be automatically filled in based on the filename of the media, in accordance with the naming conventions set out by the production. For example, if a Version is named “MFO_023_011_v001”, it would be automatically linked to an existing Shot called “MFO_023_011”.
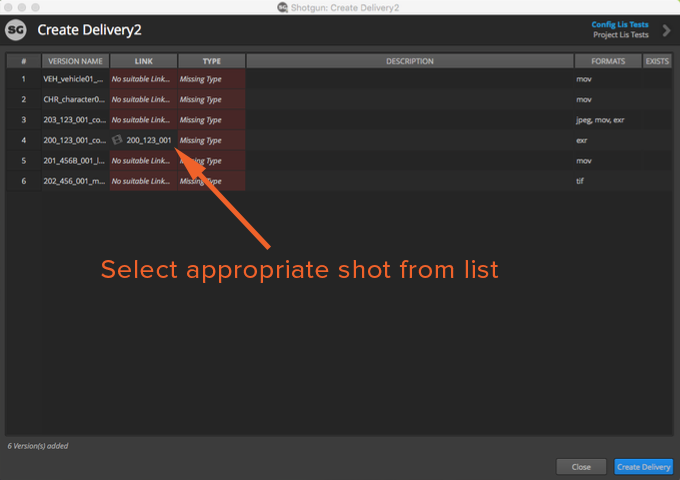
If a field is red, it means your files are not autopopulating correctly and you could have a naming convention error or you may need to manually update a field. You should either:
- Right click and remove the file, then correct the naming convention and resubmit
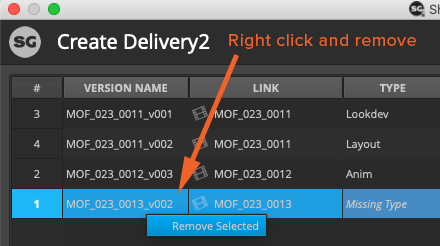
- Manually link the file by selecting the field(s) and choosing the correct entry
Editing Fields Using a CSV
If you prefer, you can fill in a spreadsheet with the details. The spreadsheet headers must match the headers shown in the Create Delivery application, and must be saved as a CSV file.

Note: The Version name should be provided without any file extensions (i.e., without “.mov” and so on). Multiple formats (e.g. DNxHD, MP4, EXR sequence) are treated as a single line item for each Version, and should not be included separately (so for example tx_ttf_00001 above might relate to several files).
To import metadata from the CSV, drag the CSV onto the Create Delivery window. The metadata will be updated accordingly.
Tip: Your media must be added to the Create Delivery app BEFORE you drag in your .CSV to update the metadata
Bypass Validation Errors
In some scenarios Production may request that Vendors meet certain file criteria for their submissions, for example:
- FPS
- Resolution
- Bit rate
- Codec
If a file does not meet that criteria it will be flagged in the delivery:
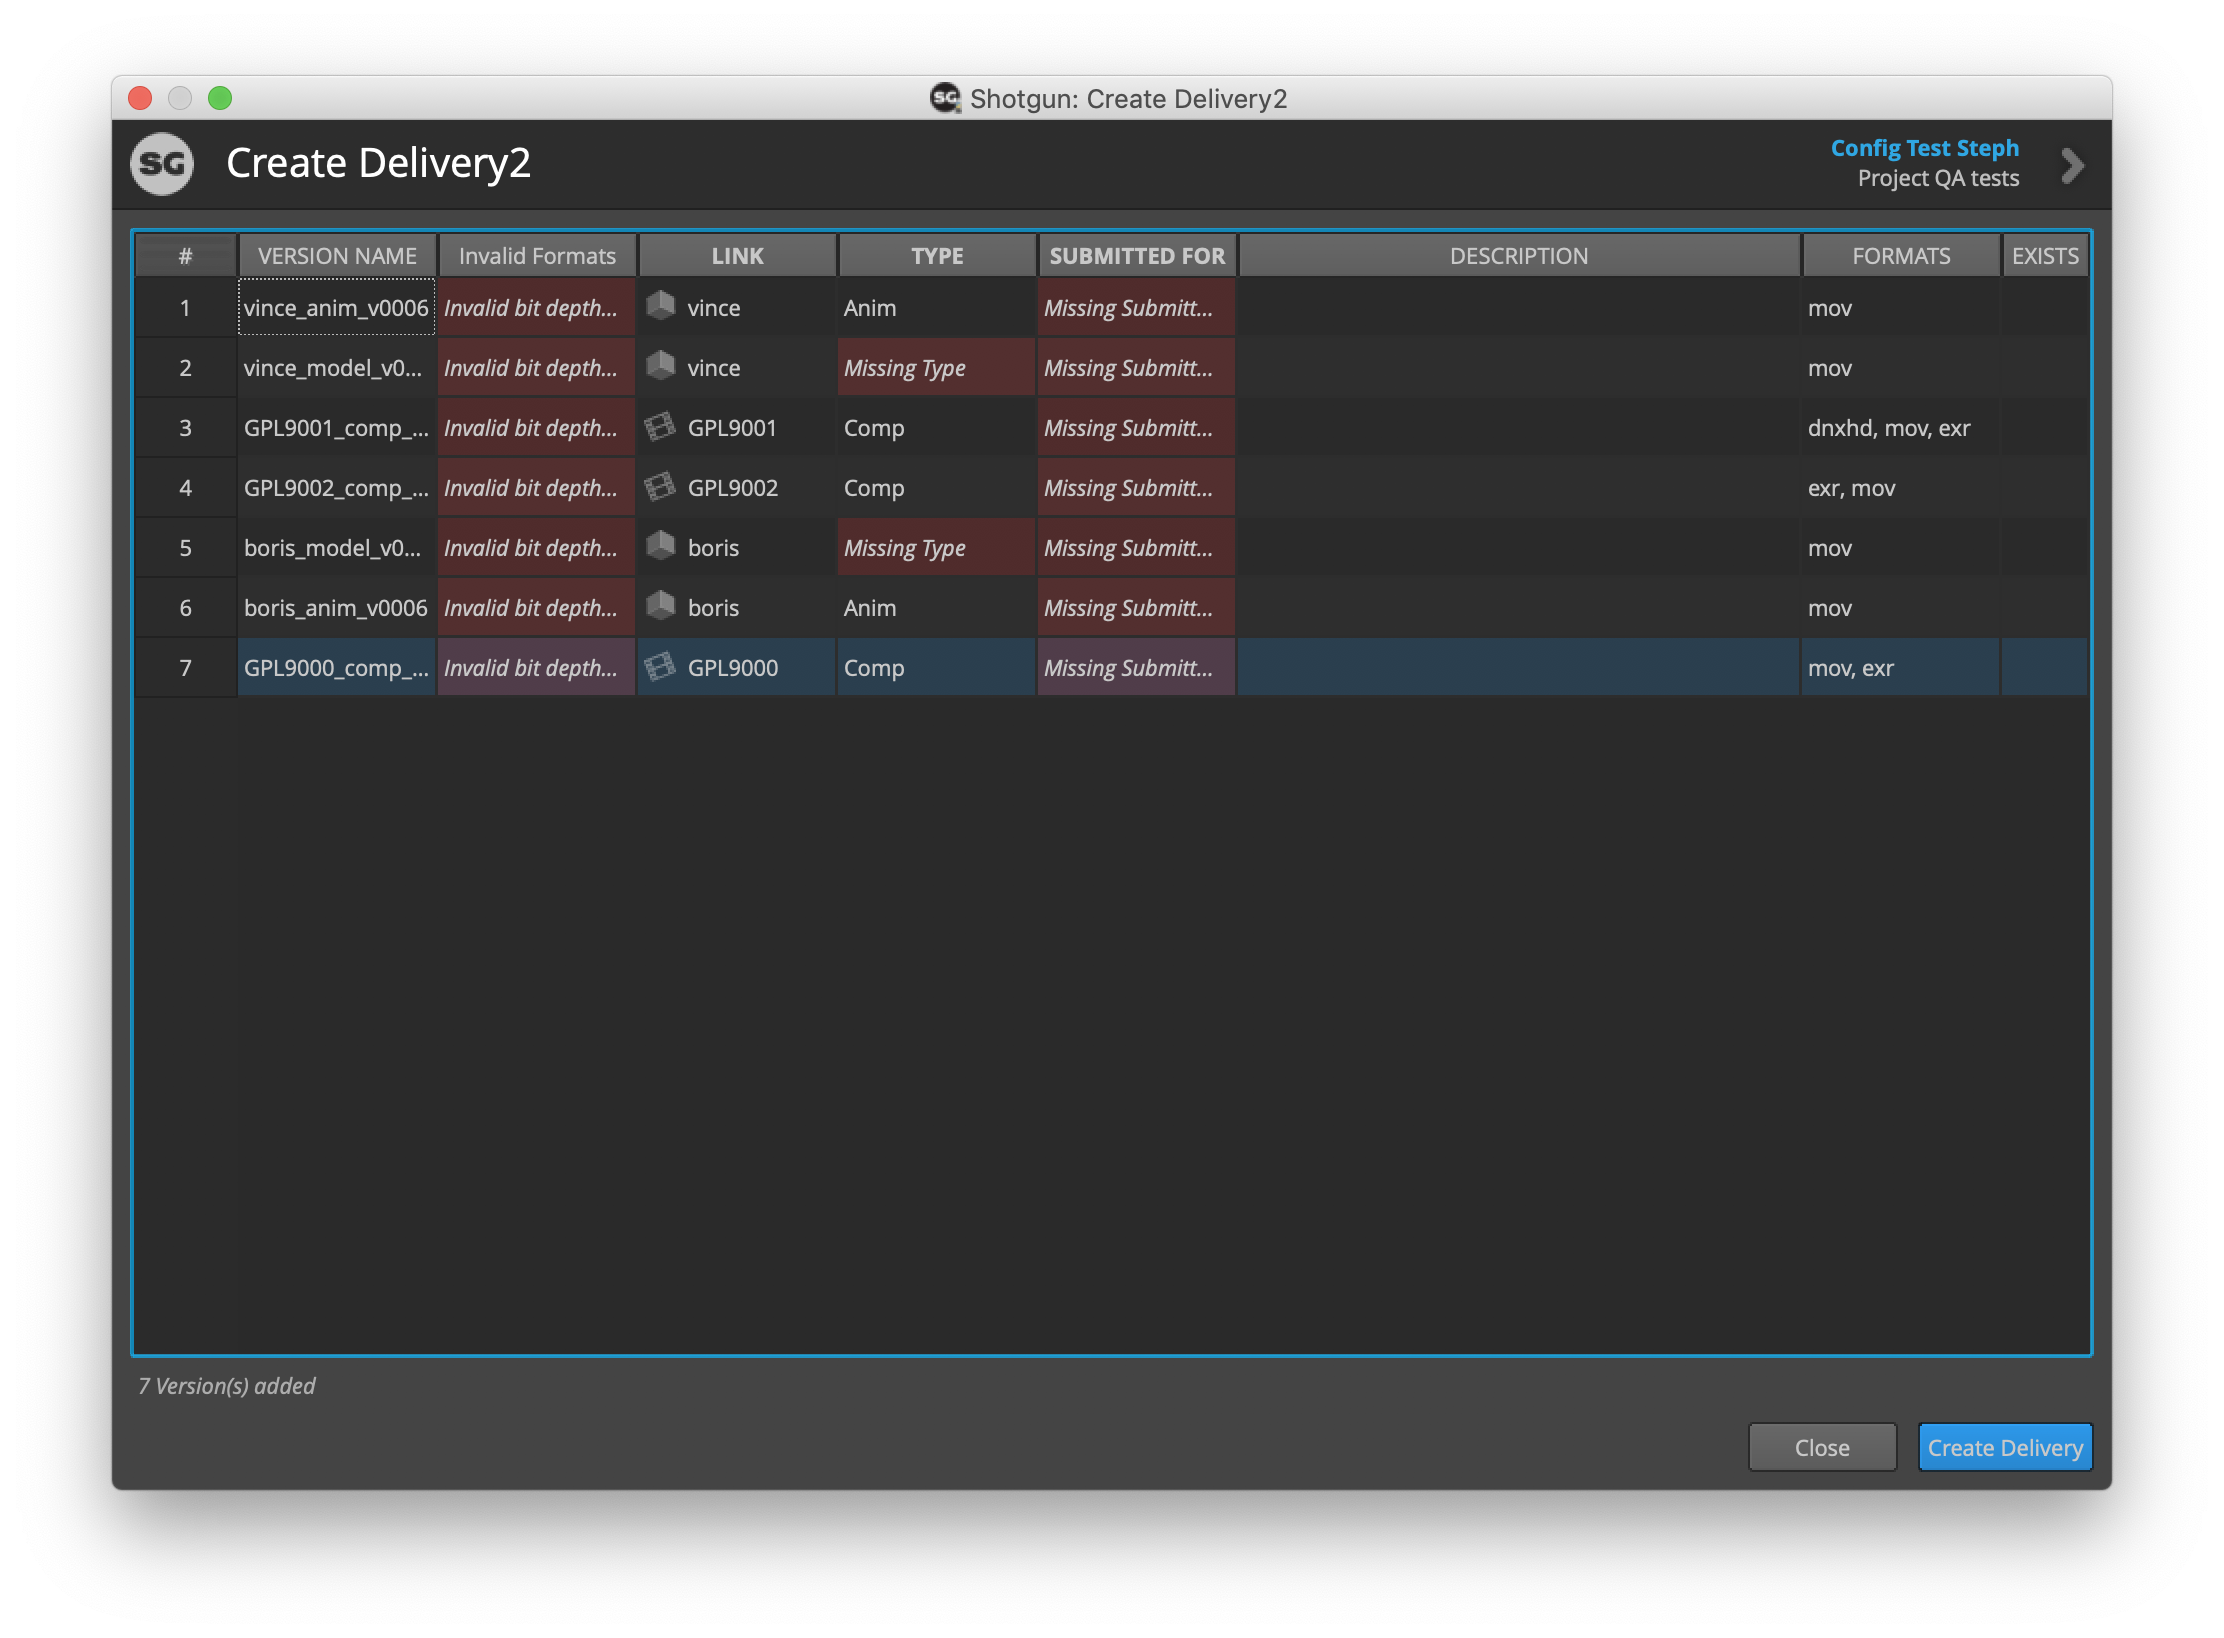
Most often Production will require the Vendor to remove and replace the affected files with the correct file criteria, but in some cases Production will allow Vendors to bypass validation errors.
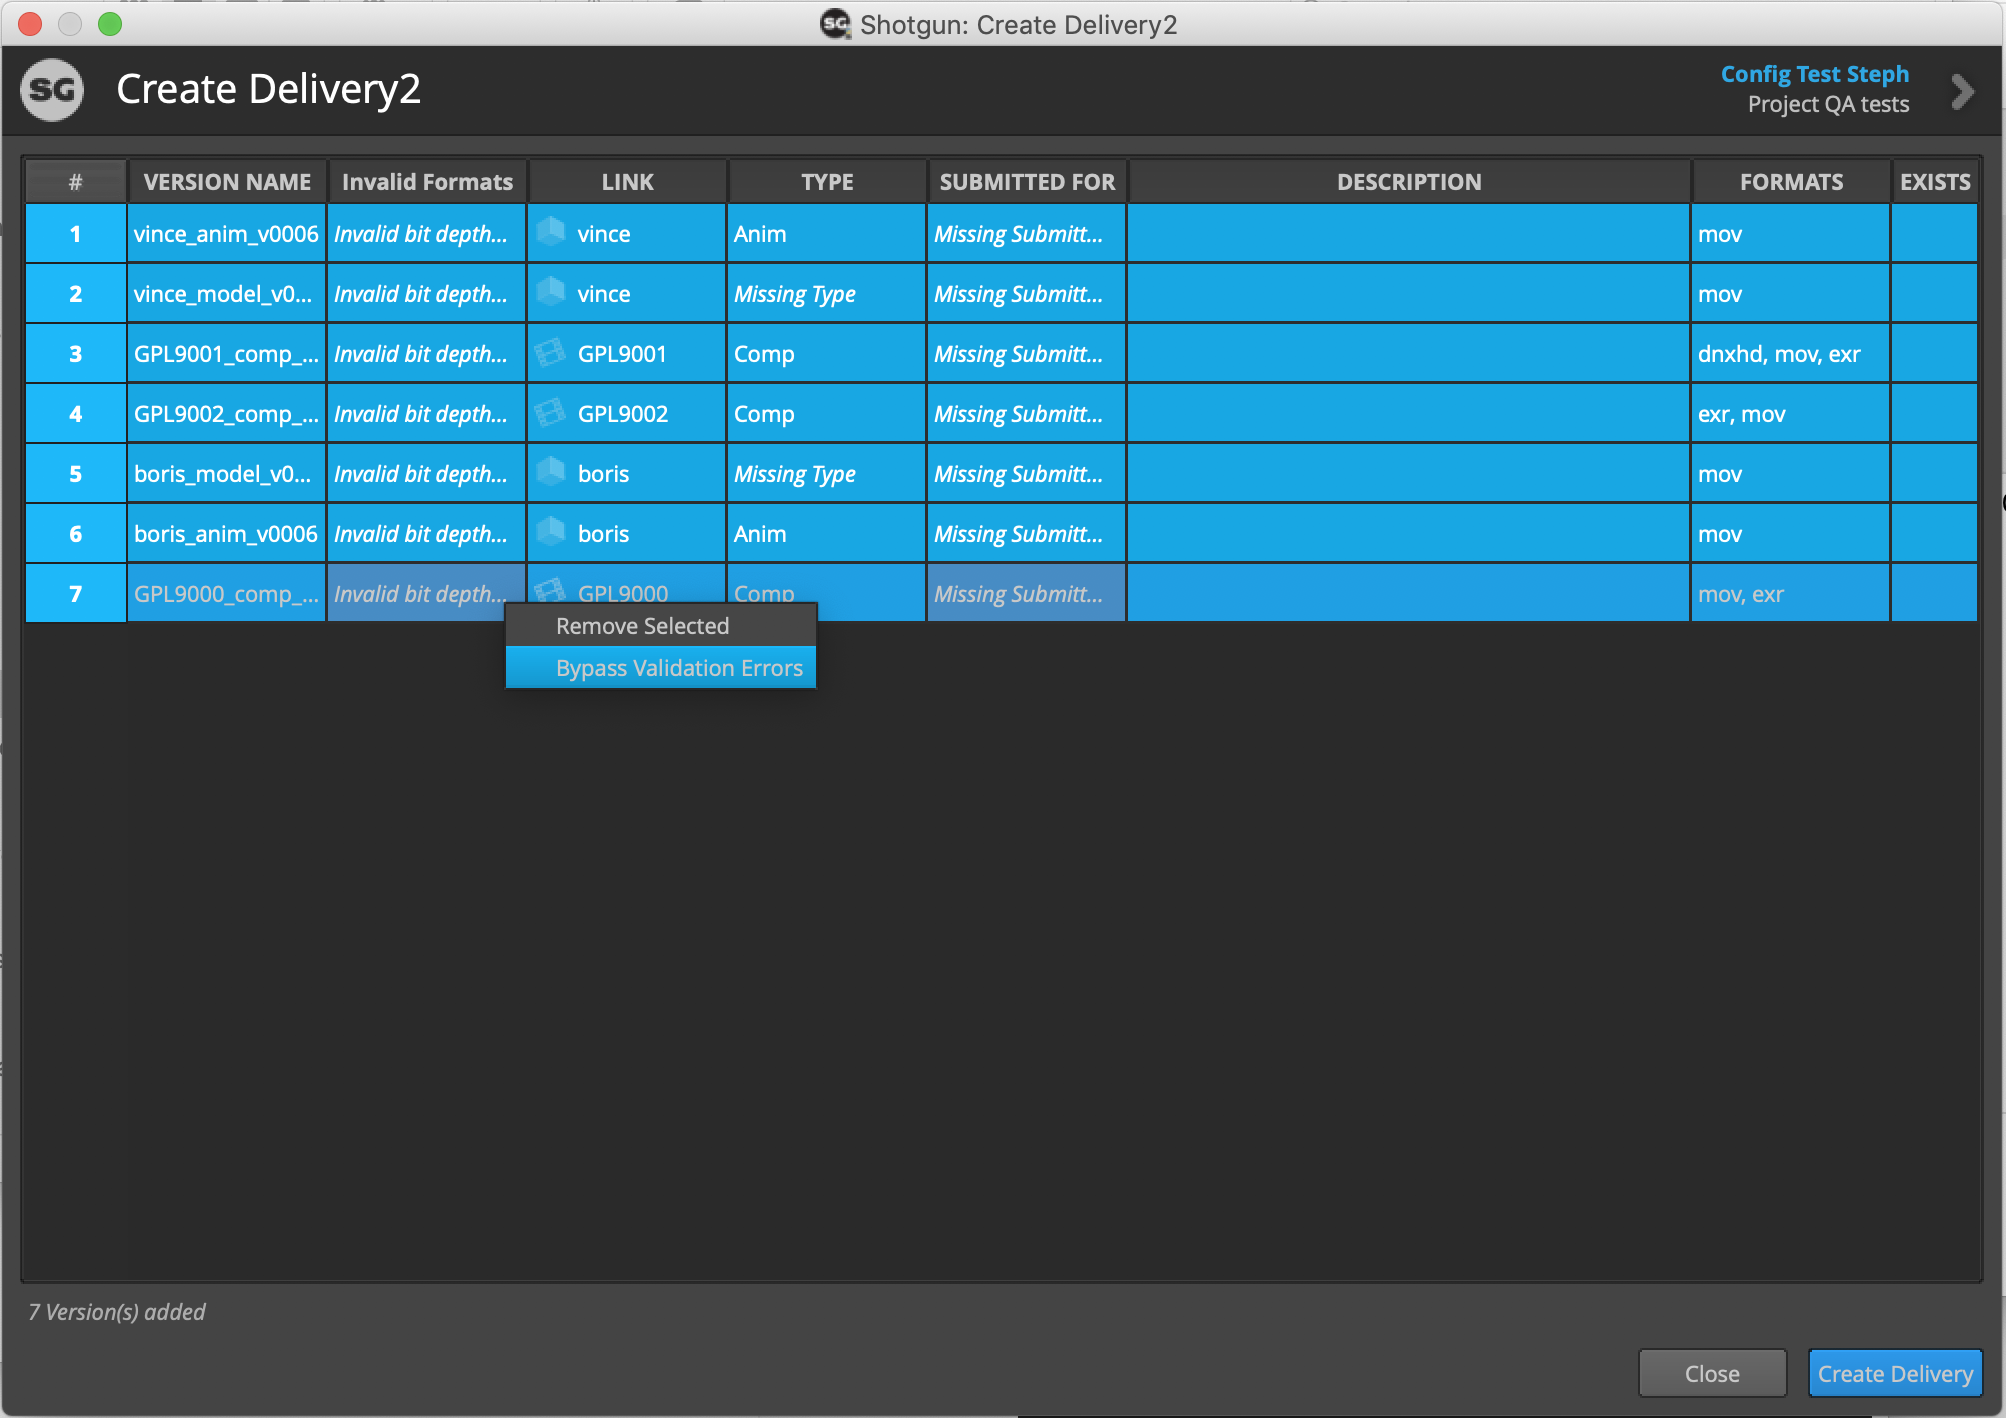
To bypass errors, highlight each affected entry and right click and select “Bypass Validation Errors”
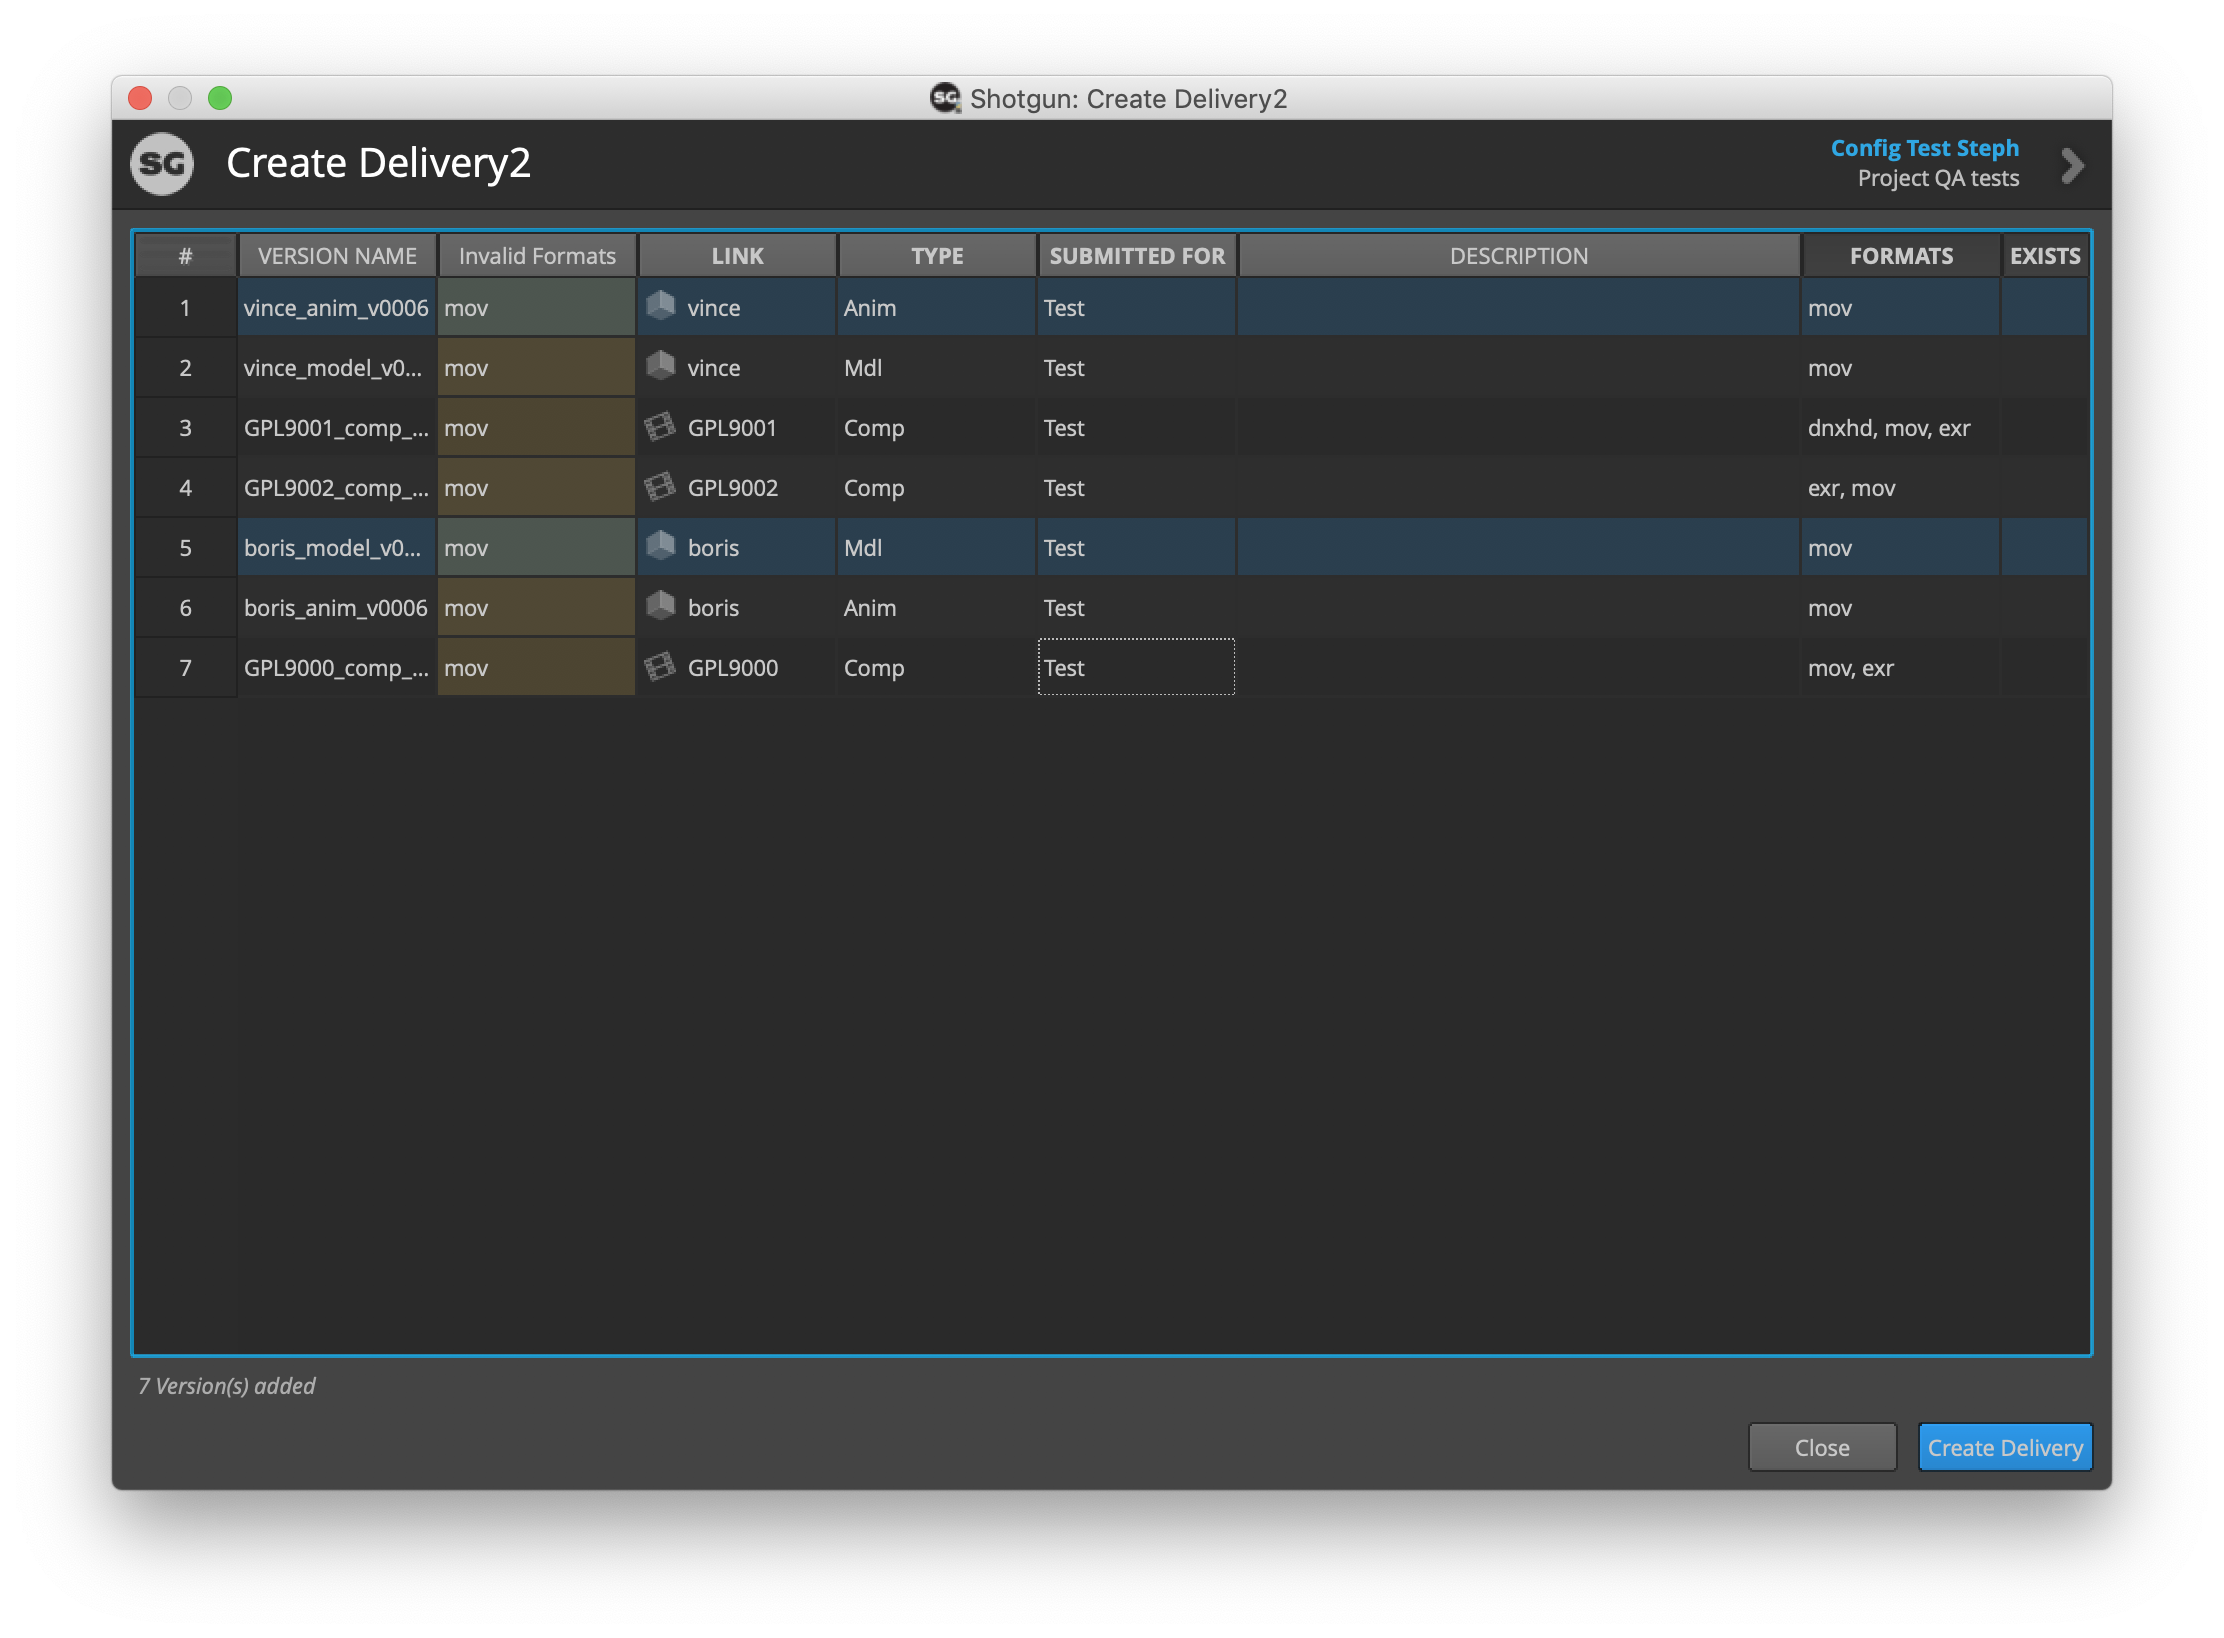
When a required field has been bypassed it will appear as a yellow caution field:
Prior to completing the delivery the User will be asked to confirm they would like to send the files inspite of the errors which are listed:
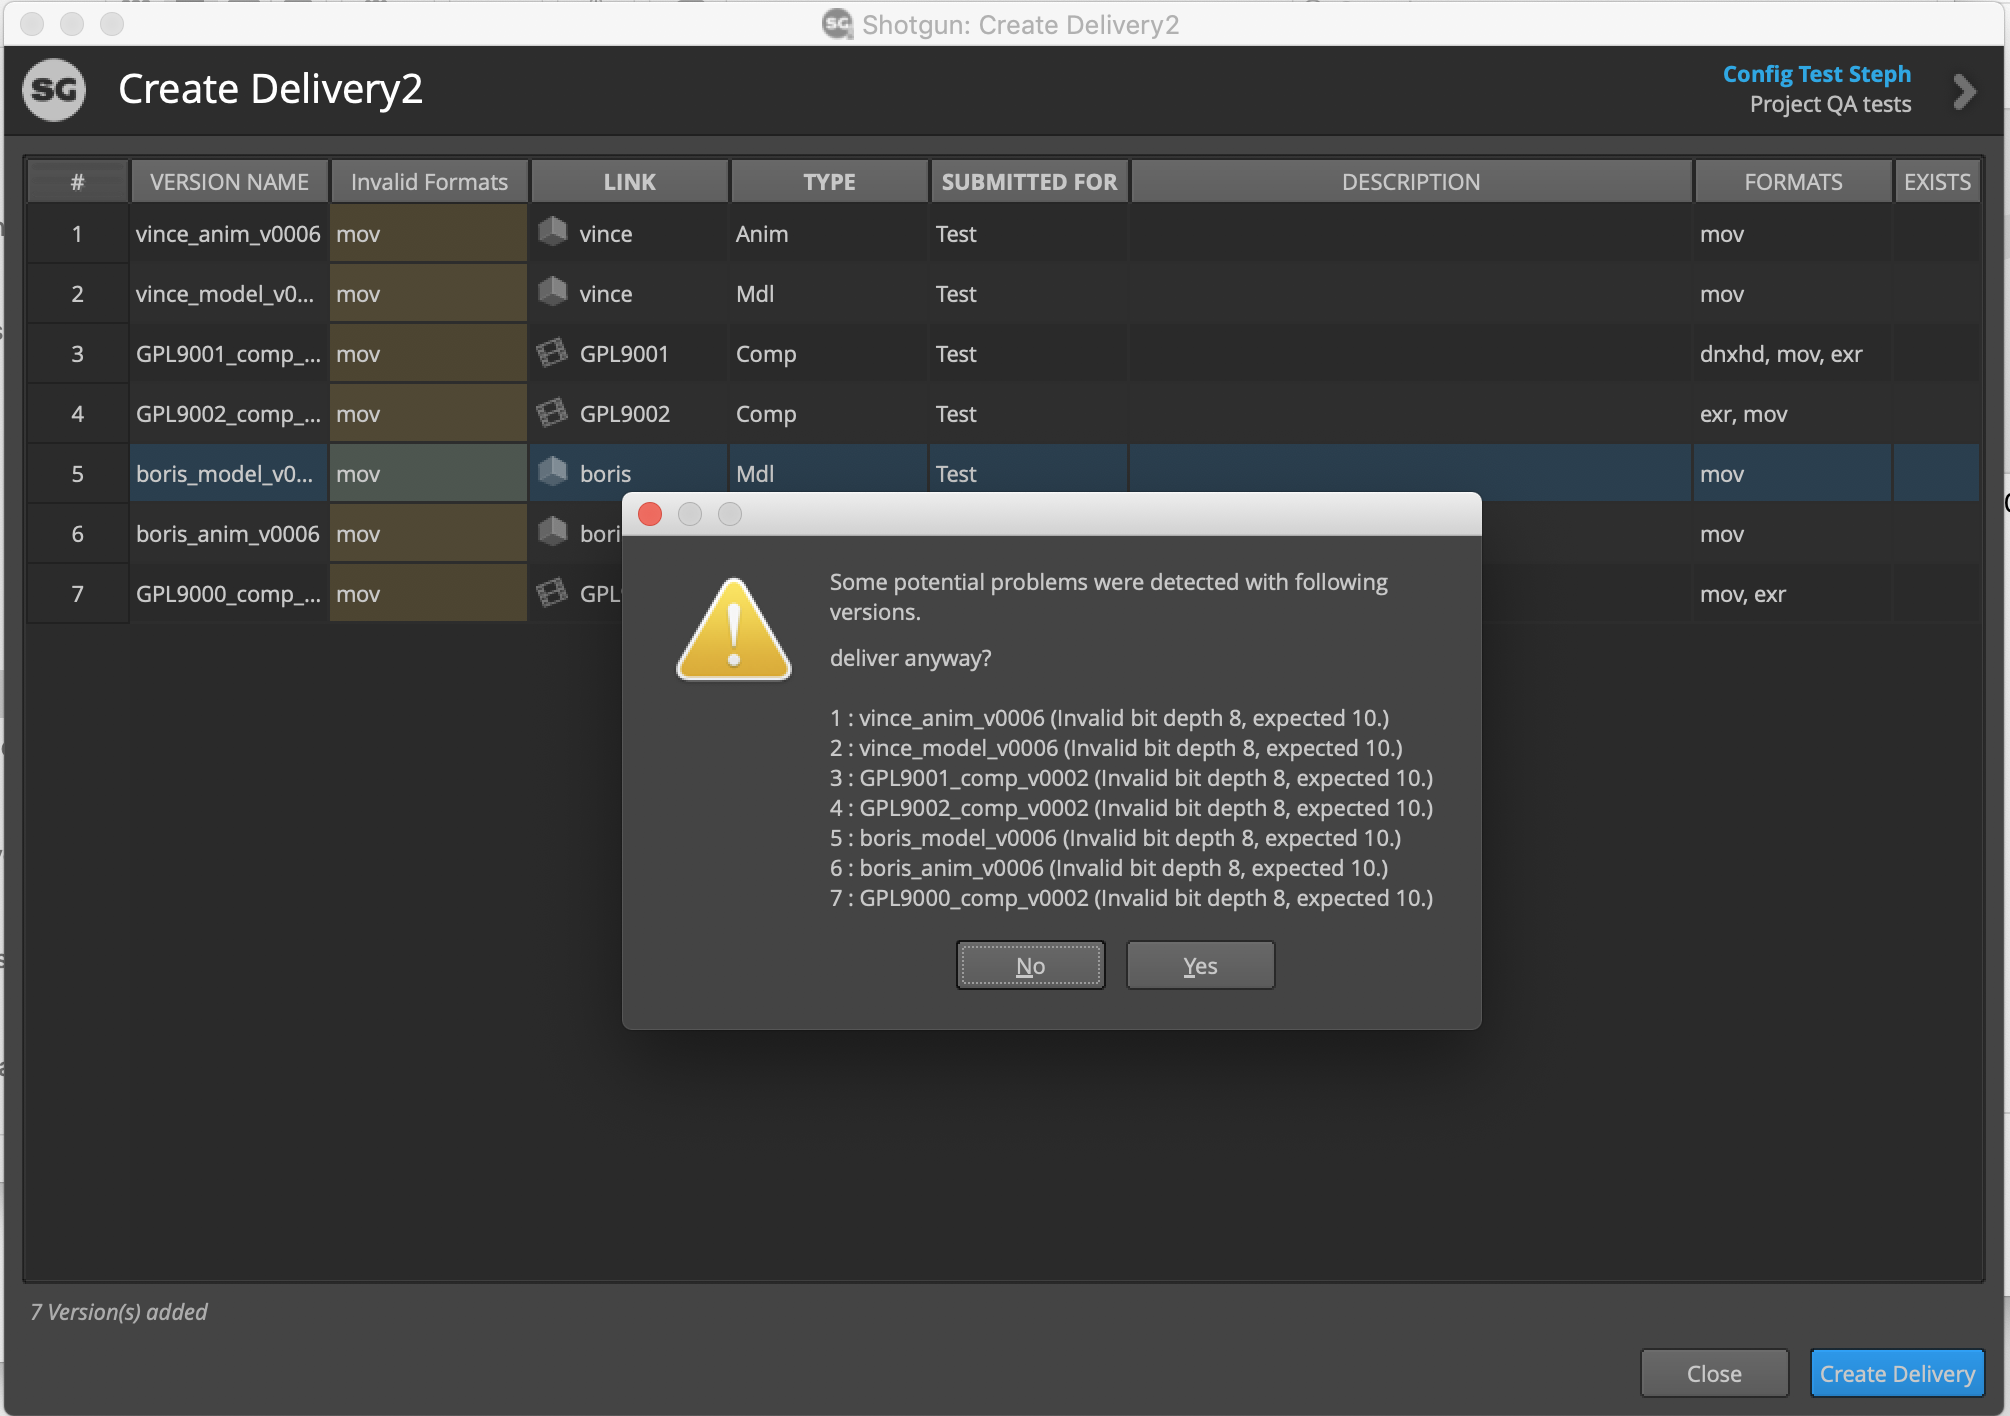
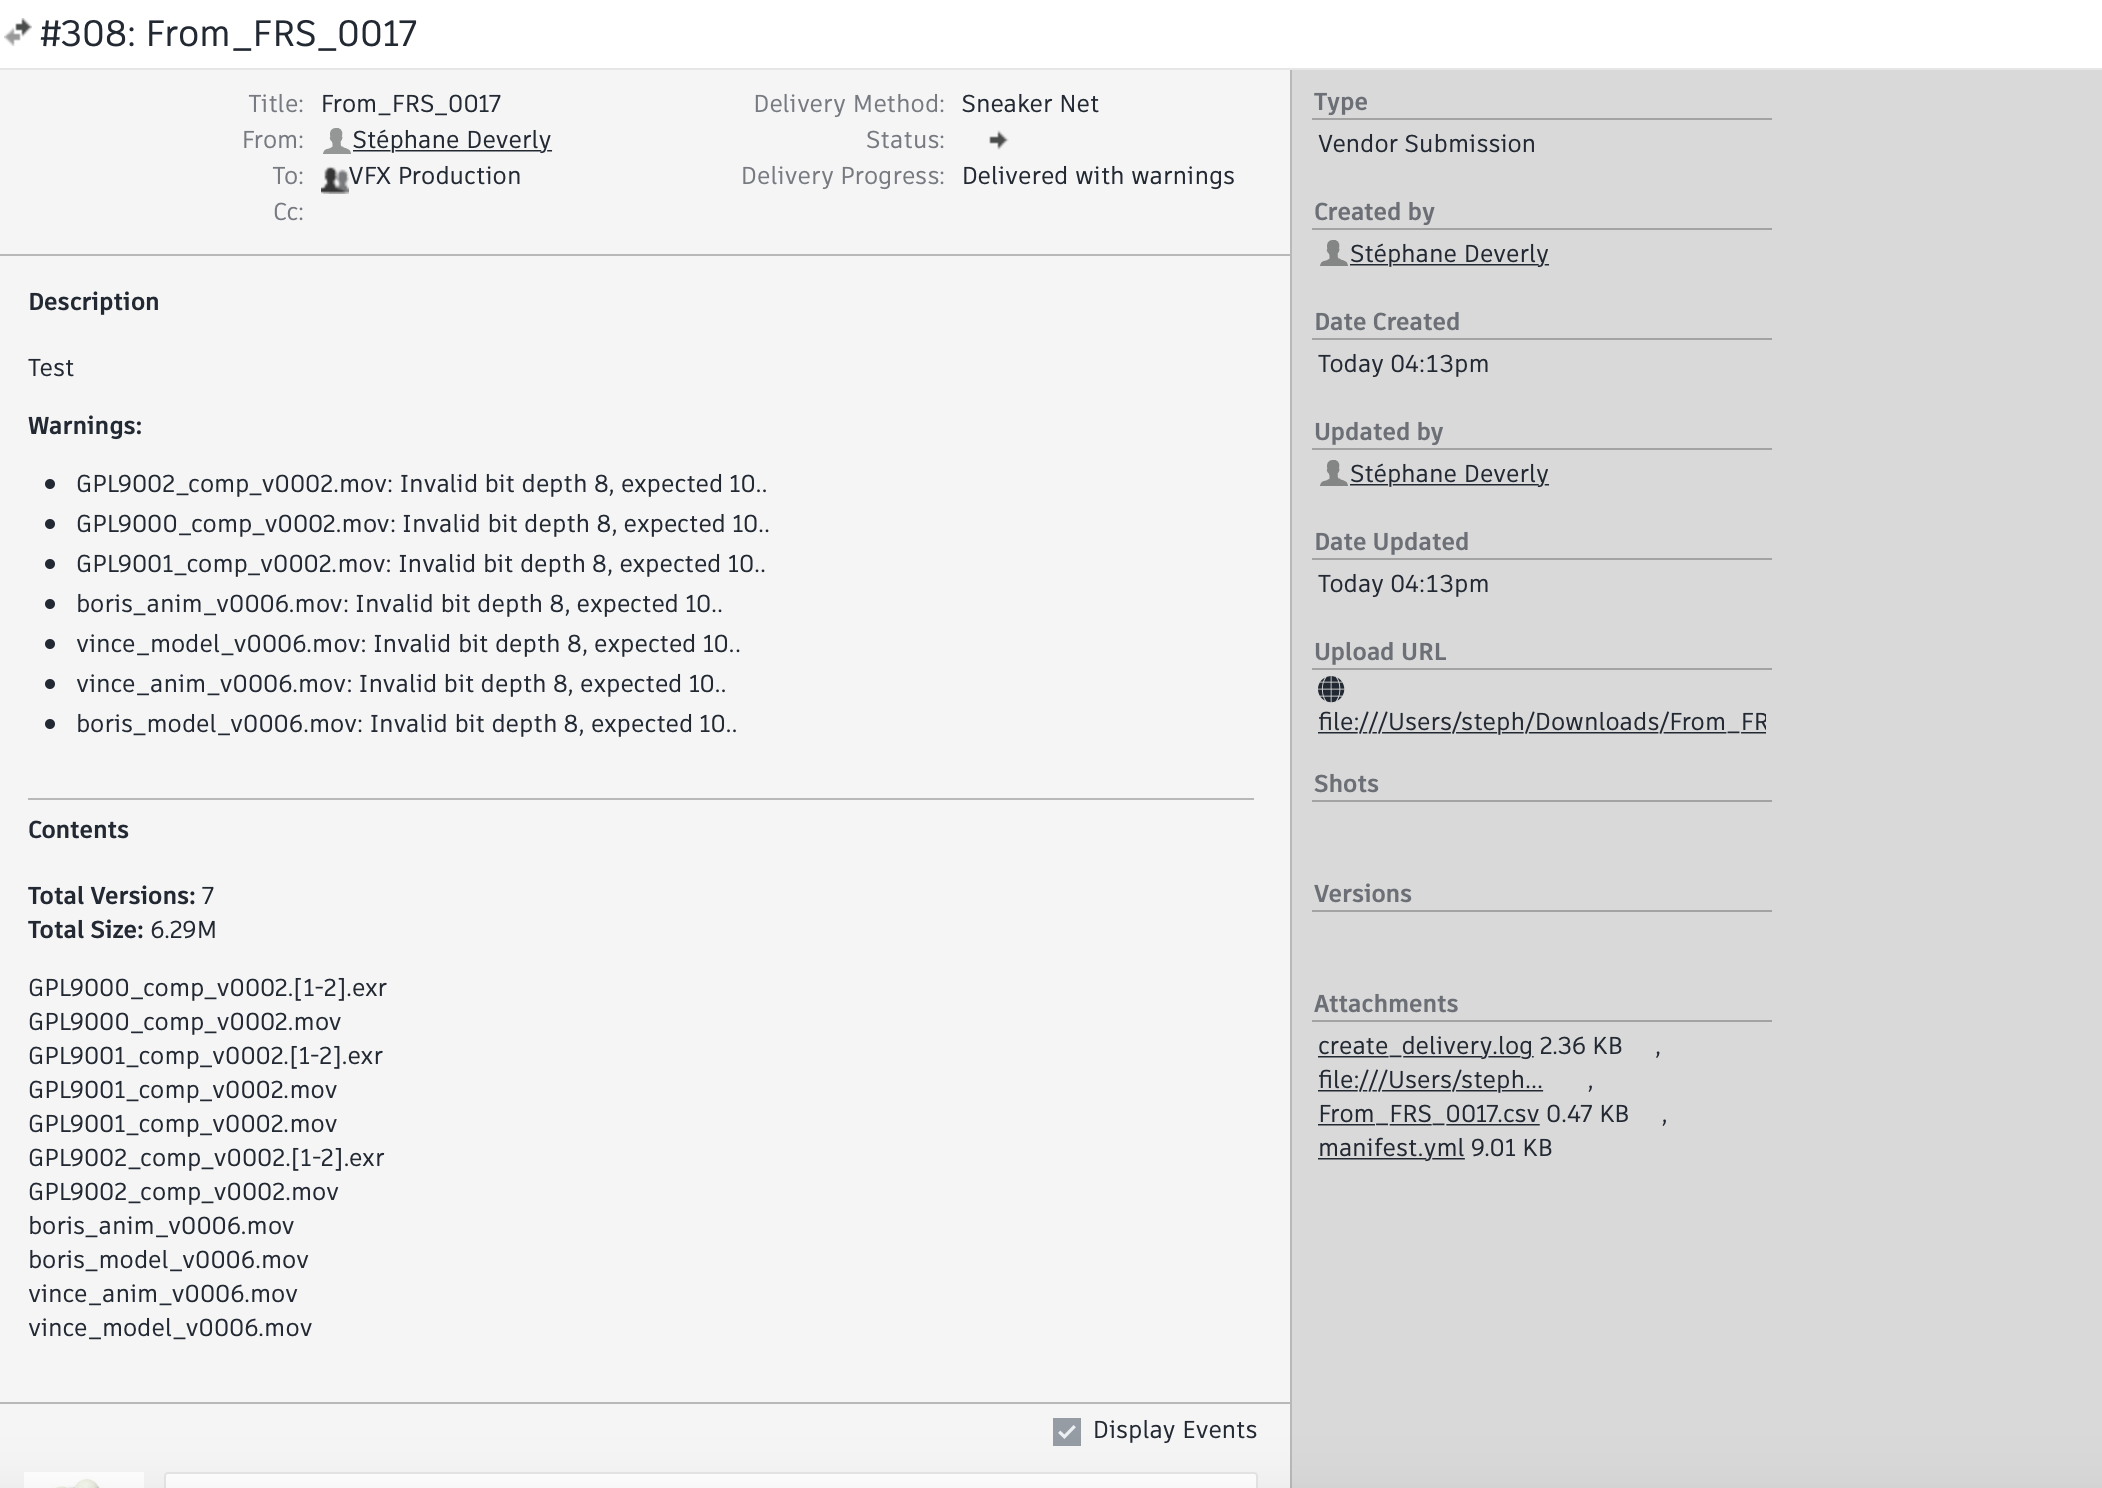
If the Vendor chooses to send the files the delivery record will record which files have been flagged and why:
Starting the transfer
To complete your submission, click Create Delivery and the following window will appear:
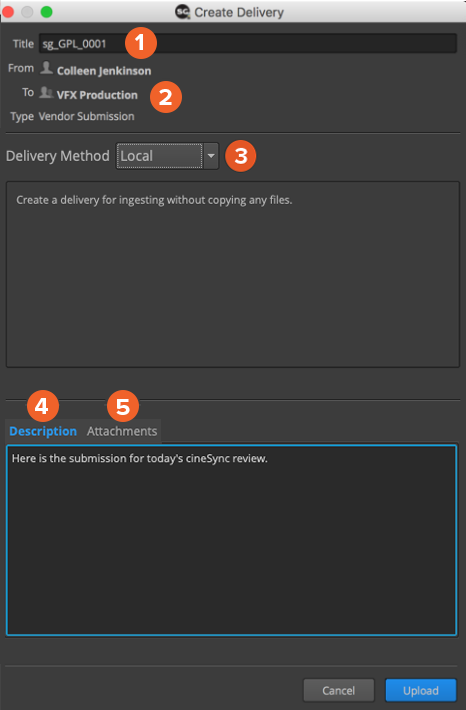
1) Give the delivery a title (or use the automatically generated one), and fill in the rest of the information as needed.
Tip: Ensure that your title is unique, if you have already created a delivery with this name you will get an error-message and have to set up your delivery again.
Note: The auto-generated title will be created based on the current date, your vendor code and the number of submissions the vendor has made in that day.
2) These fields autopopulate
- “From” field autopopulates based on your SG username.
- “To” field autopopulates “VFX Production”
- “Type” autopopulates “Vendor Submission”
Note: any of these fields can be manually updated
3) In the “Delivery Method” section, choose Local.
4) Provide a description of your delivery if needed.
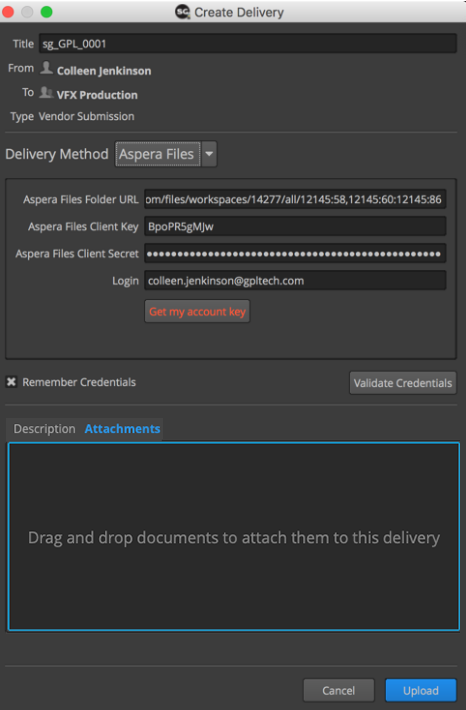
5) Attachments can be added to the delivery by dragging and dropping files into the window.
To complete the process and initiate the delivery, click “Create”.
A Delivery log and manifest will be created, and Shotgun will send notifications to everyone the submission is addressed to..
Tip: To receive notifications by email, ensure that you are subscribed to “My Deliveries” in Shotgun’s Account Settings. Vendors wanting to receive notifications by email should request this setting from Production.
Note: Once the delivery has been created, it cannot be amended. If you need to submit more files later you’ll need to create a new delivery.
CONGRATULATIONS! You have just completed your first Local Delivery!
Additional Information
Explanation of Fields in Create Delivery 2
Version Name This is the name of the submitted file without the extension listed. If you are submitting the same version in different formats (i.e. an EXR sequence or DNxHD of the same shot version, or an OBJ and MOV of the same asset version) the filenames, excluding extension, should be EXACTLY the same so they link to a single version in Shotgun.
Link The link is the parent sequence, shot, or asset entity in Shotgun that each version relates to. In most cases the Create Delivery2 app will automatically match your correctly-named version to its appropriate link. If not you can manually select the appropriate link.
Type These are predefined Version types that have been setup in Shotgun (i.e. Anim, Comp, Concept, Edit, etc)
Submitted for These is a predefined list that has been setup in Shotgun (i.e. WIP, Final, Temp, etc)
Formats, Is Stereo, Exists These fields are automatically populated based on file criteria and cannot be modified.